Hatching Carrot Crochet Pattern
This free Hatching Carrot crochet pattern is the sweetest spring make for your Easter celebrations! Designed to fit the Ittie Beattie Bunny crochet pattern, this carrot “hatches” to reveal a tiny friend – perfect for Easter baskets, playtime, or spring markets. Keep reading for step-by-step instructions to make your own adorable Hatching Carrot for your little crochet bunny!
You can purchase a downloadable and beautifully formatted Hatching Carrot pattern HERE, or in my Etsy shop HERE.


Did you know that the Beattie Bunny is actually a sister pattern to the Mama and Mini Mabel Chicken crochet pattern? Both include a mama and baby- which means both the tiny bunny (Ittie Beattie Bunny) AND the Mini Mabel fit perfectly into this Hatching Carrot crochet pattern!
You can pick up a copy of the Beattie Bunny crochet pattern HERE, or in my Etsy shop HERE.
The Mama and Mini Mabel pattern can be found HERE, or in my Etsy shop HERE.


Let’s hop in!
This post contains affiliate links for Etsy and Amazon. If you make a purchase by clicking on them, I make a small commission at no extra cost to you. Read my full affiliate disclosure HERE. Thanks for your support!
NOTES:
- For a snug fit and consistent look, use the same yarn brand and hook size for both your Ittie Beattie Bunny/Mini Mabel Chicken and Hatching Carrot. A 7mm hook is recommended for the carrot, even though the Beattie and Mabel patterns suggest 8mm. If you’ve already used 8mm for your bunny or chicken, stick with 8mm for the carrot too.
- 10mm eyes were used for the bunnies and chickens in these photos.
SUPPLIES:
- Size 6 super bulky weight yarn in 2 colors.
- 7 mm crochet hook
- Stitch markers
- Scissors
COLORS USED IN PHOTOS:
Premier Basix Chenille Brights in the colors Rust and Sage.
ABBREVIATIONS:
ch – chain
FLO – front loop only
FO – fasten off
inc – 2 sc in the same st
mc – magic circle
sc – single crochet
sl st – slip stitch
st(s) – stitch(es)
YO – yarn over
INSTRUCTIONS:
Let’s make a Hatching Carrot together! Watch the video tutorial HERE.
BOTTOM HALF OF CARROT:
Round 1: 4 sc in mc (4)
Round 2: (sc, inc) x 2 (6)
Round 3: (inc, 2 sc) x 2 (8)
Round 4: (3 sc, inc) x 2 (10)
Round 5: (inc, 4 sc) x 2 (12)
Round 6: (5 sc, inc) x 2 (14)
Round 7: (inc, 6 sc) x 2 (16)
Round 8: (7 sc, inc) x 2 (18)
Round 9: (inc, 8 sc) x 2 (20)
Rounds 10-14: sc around (20) (5 rounds/100 sts)
FO, leaving a tail to complete Invisible Finish steps below.
TOP HALF OF CARROT:
Round 1: 6 sc in mc (6)
Round 2: inc around (12)
Round 3: (sc, inc) x 6 (18)
Round 4: (8 sc, inc) x 2 (20)
Rounds 5-8: sc around (20) (4 rounds/80 sts)
FO, leaving a 24″ tail and complete Invisible Finish steps below.
INVISIBLE FINISH:
This step creates a seamless transition between the last and first stitches of the round. This step will be completed after making both the bottom and top halves of the carrot.
NOTE: Leave a 24″ tail for top half of carrot before completing this step.
1: With a yarn needle, bring finishing tail through top loops of the second st of the final round, from front to back.
2: Bring tail through back loop only of the last st from the final round, from front to back.
3: Pull gently until tail forms a new set of “top loops”.
Weave in ends for bottom half of carrot only. Do not cut or weave in end for top half – continue to Attaching Top and Bottom steps.


ATTACHING TOP AND BOTTOM:
Using the long tail from the top half of the carrot, YO and insert your hook through the FLO of the 2nd to last st on round 8.
Now insert your hook into any st on the bottom half of the carrot and work 6 sl sts though outside loops to join and create a hinge.
FO and weave in ends.
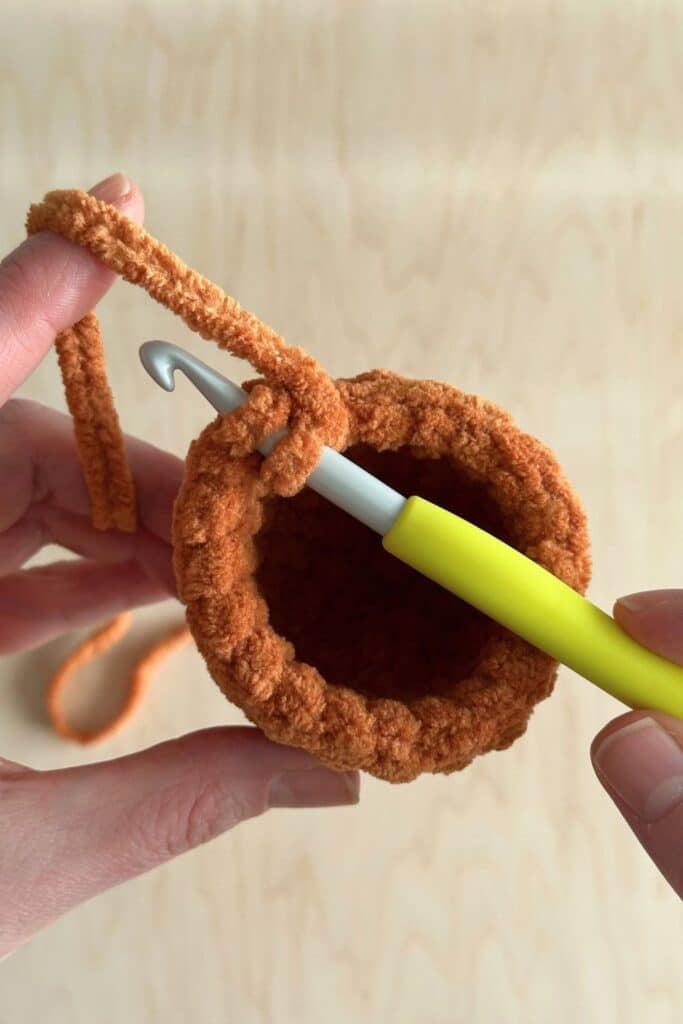


CARROT TOP:
Three leaves will be worked onto the top half of the carrot around the edge of round one.
With a slipknot on your hook, insert into the edge of round 1, YO and pull through to complete a sl st.
Ch 6, starting in the 2nd ch from your hook,
inc, 2 sc, 2 sl sts, then sl st into the base of the carrot to start the next leaf. After the 3rd leaf is completed, sl st into the base of the 1st leaf.
Knot tails together. Use a yarn needle to thread them between the leaves into the center of round 1. Weave the tails in on the inside of the carrot.


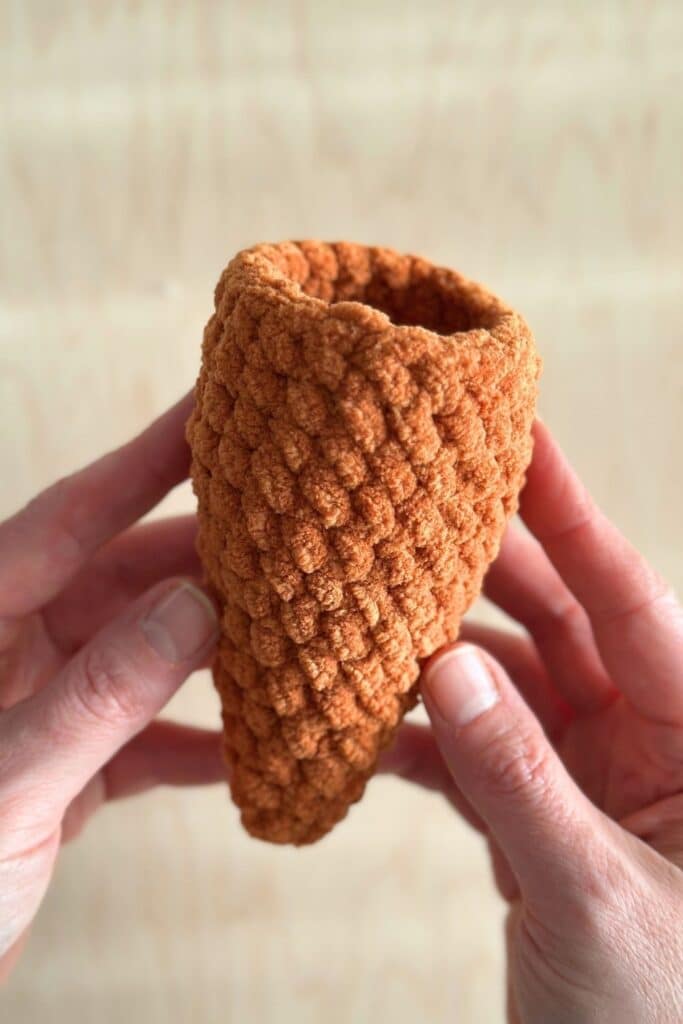
Your Hatching Carrot is done! This little carrot is the perfect fit for all the little Easter friends and goodies!


I hope this fun and interactive Hatching Carrot crochet pattern brings a little joy and whimsy to your spring crochet projects!
Enjoy and happy making!
Check out my other popular blog posts here:
Mini Mabel Hatching Egg Crochet Pattern
If you’d like to stay up-to-date with my latest blog posts and free patterns, sign up HERE for my newsletter!
All patterns, designs and photographs included in this blog post are property of Oak and Marlow. This pattern is for personal use only and may not be sold, distributed or transferred to any other person or website. Handmade items produced with this pattern may be sold as long as credit is given to the designer – Oak and Marlow. Copyright 2025.
This pattern is so helpful and very cute bunny and perfect for Easter
Just finished the carrot/ittie beattie bunny combo. My daughter just declared this the cutest thing I have ever made…thank you!
Aww thank you so much! I’m so glad your daughter loves them! 🙂