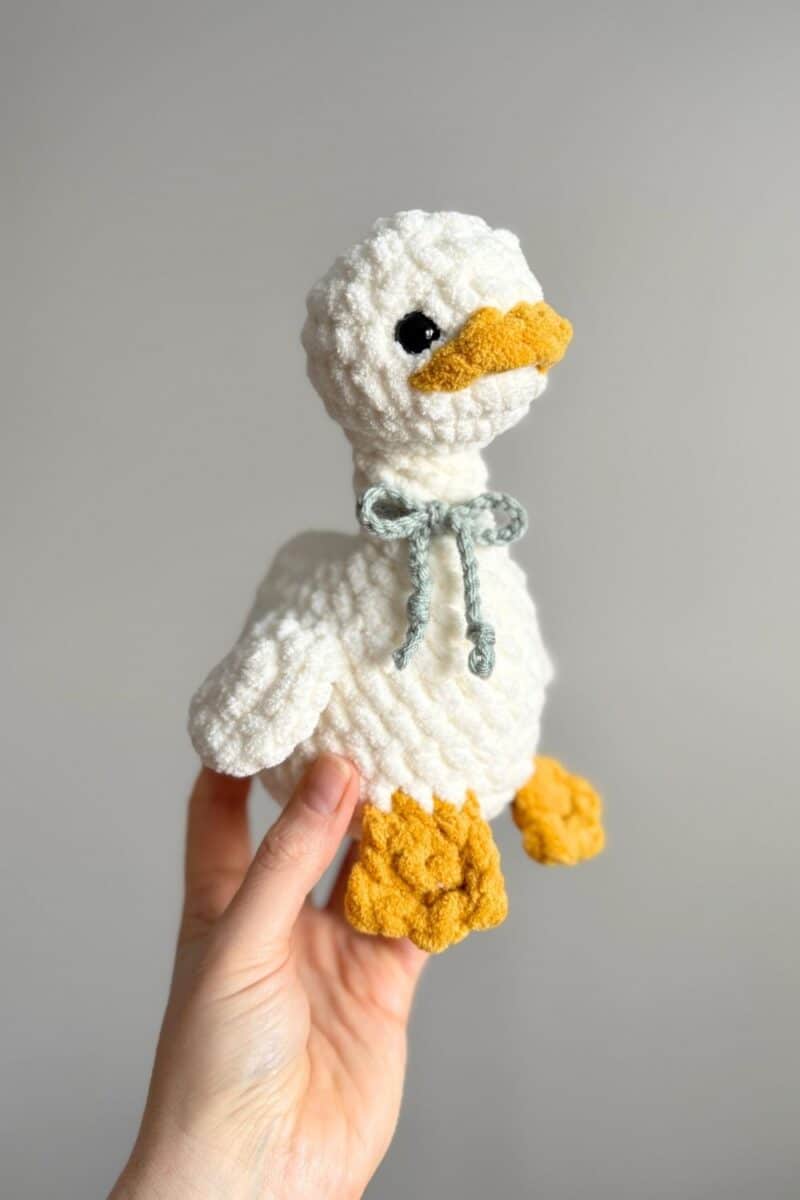
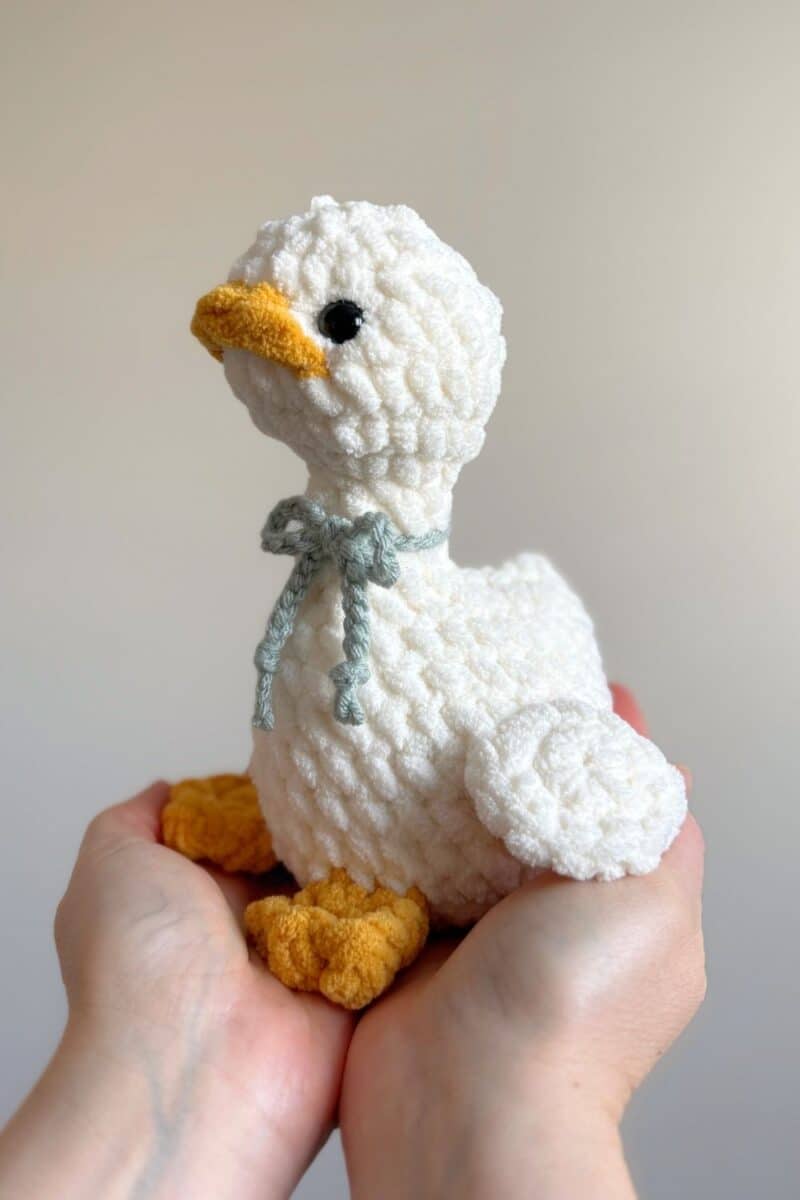
Marjorie Goose Mod
Meet Marjorie Goose! This post includes a free modification for the Mabel Chicken crochet pattern, turning your chunky chicken into a silly little goose. She’s sweet, a little bit nosey, and has the cutest pouty face!
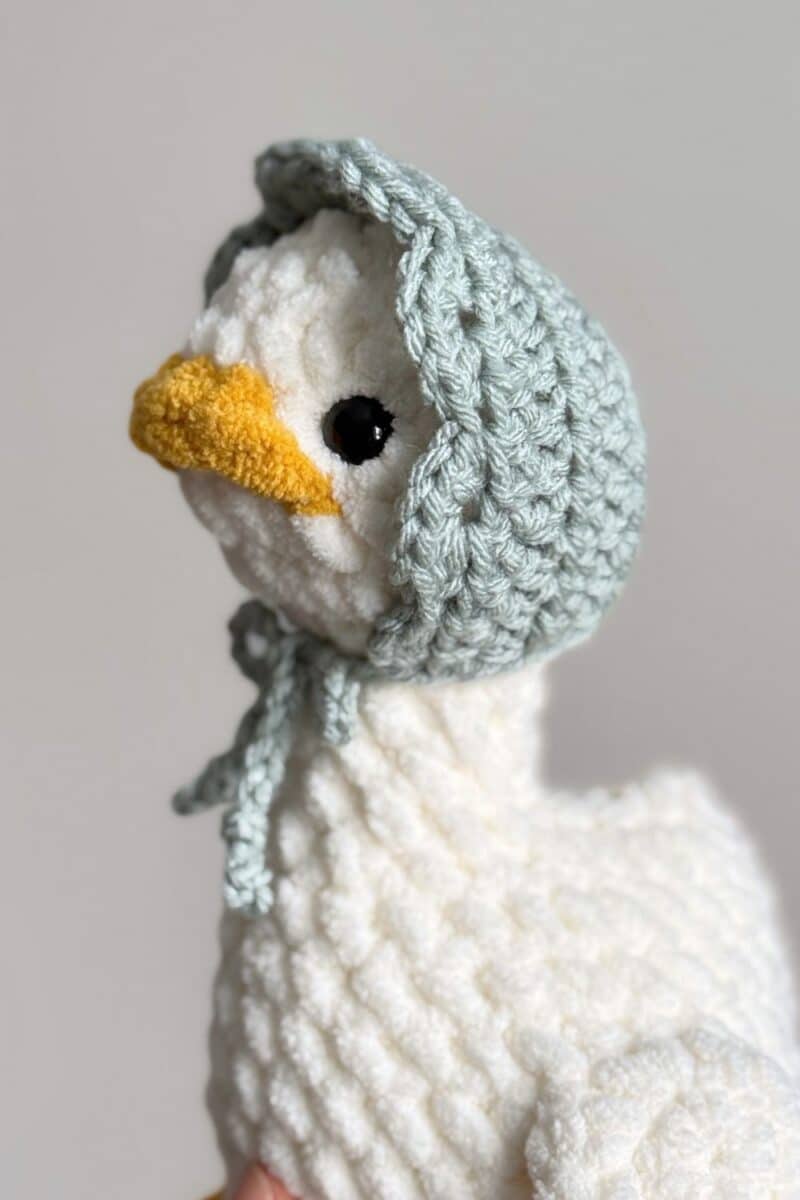
You can pick up an ad-free copy of the Marjorie Goose Crochet Pattern in my shop or on Etsy. The PDF includes head-to-tail instructions with helpful tips and videos and includes a bonnet as well!
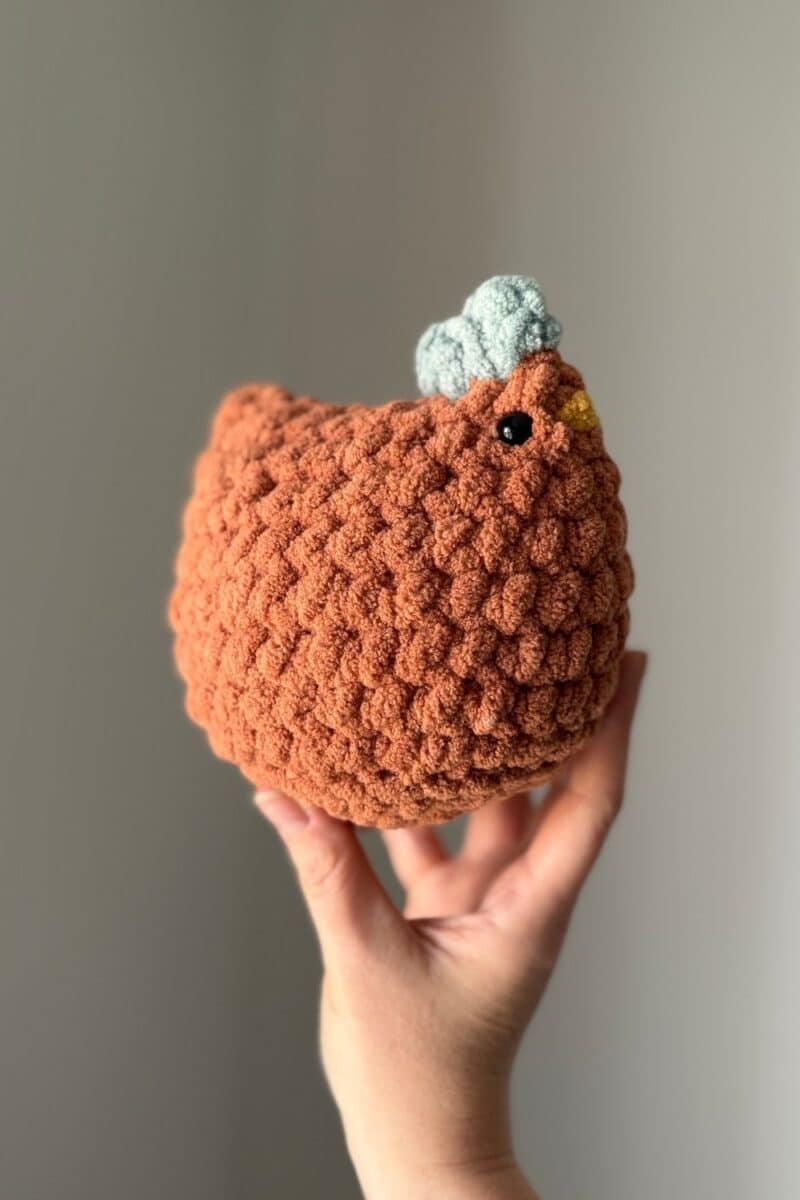
This pattern is designed as a modification for the classic Mabel Chicken crochet pattern. This little chicken has been a popular make in the crochet community. She’s the perfect plush crochet project for beginners, and whips up quickly, making her great for markets and gifts!
You can pick up a copy of the Mabel Chicken crochet pattern in my shop or on Etsy HERE.
Let’s jump in!
This post contains affiliate links for Etsy and Amazon. If you make a purchase by clicking on them, I make a small commission at no extra cost to you. Read my full affiliate disclosure HERE. Thanks for your support!
SUPPLIES:
- Size 6 super bulky weight yarn
- Mabel Chicken crochet pattern
- 7 mm crochet hook
- 5 mm crochet hook
- 12 mm safety eyes
- Stitch markers
- Scissors
- Stuffing material
NOTES:
- The original Mabel Chicken pattern recommends an 8mm crochet hook, yet this pattern recommends a 7mm. Either will work, but be sure to use the same hook size throughout the pattern for consistency.
- Use 7mm crochet hook for Marjorie Goose and 5mm for the bow.
ABBREVIATIONS:
(US Crochet Terms)
BLO – back loop only
ch – chain
dc – double crochet
dec – invisible decrease
FLO – front loop only
FO – fasten off
hdc – half double crochet
inc – 2 sc in same stitch
mc – magic circle
sc – single crochet
sl st – slip stich
st(s) – stitch(es)
YO – yarn over
SPECIAL STITCHES:
dec (invisible decrease)
Insert hook into front loops of the next two sts, YO and draw through first two loops, YO and draw through remaining two loops.
standing sc (standing single crochet)
With a slip knot already on your hook, insert hook into st, YO, draw up a loop, YO, and draw through both loops.
INSTRUCTIONS:
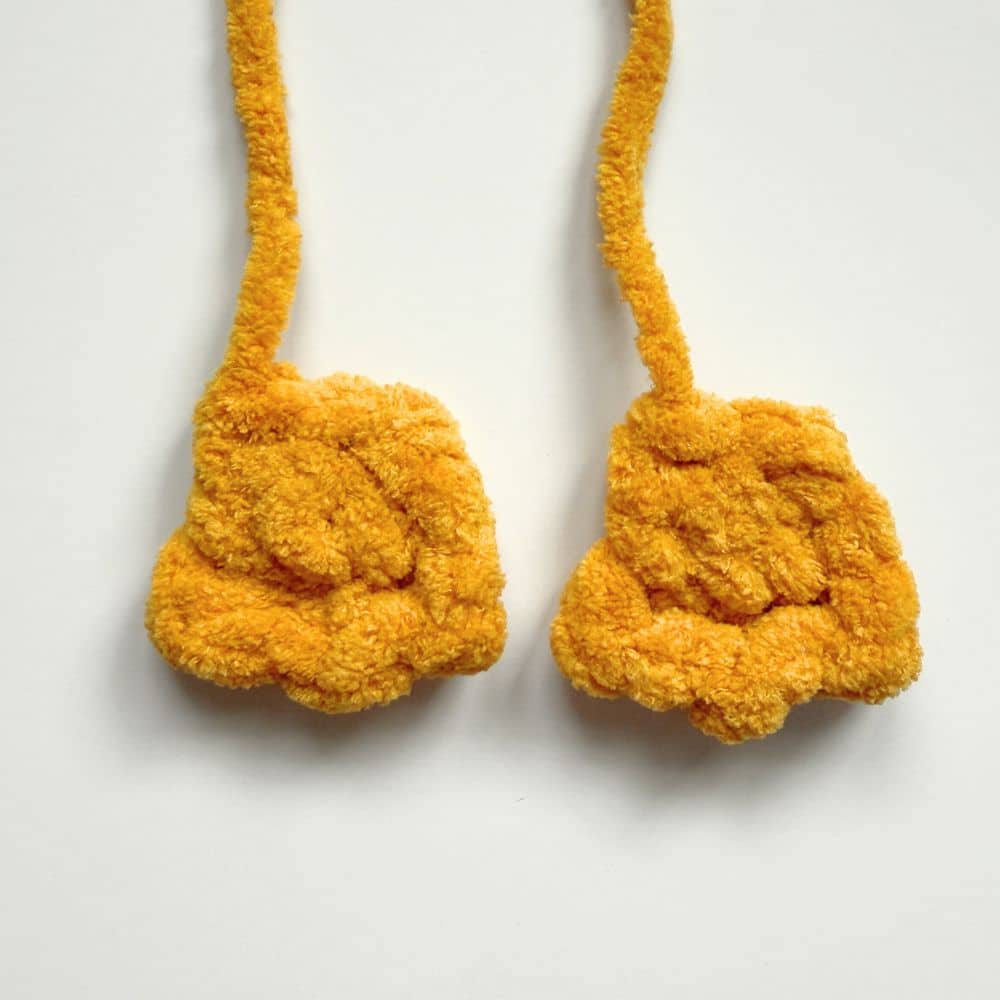
FEET:
- Make two.
- Do not stuff.
- Keep sts relaxed for starting ch.
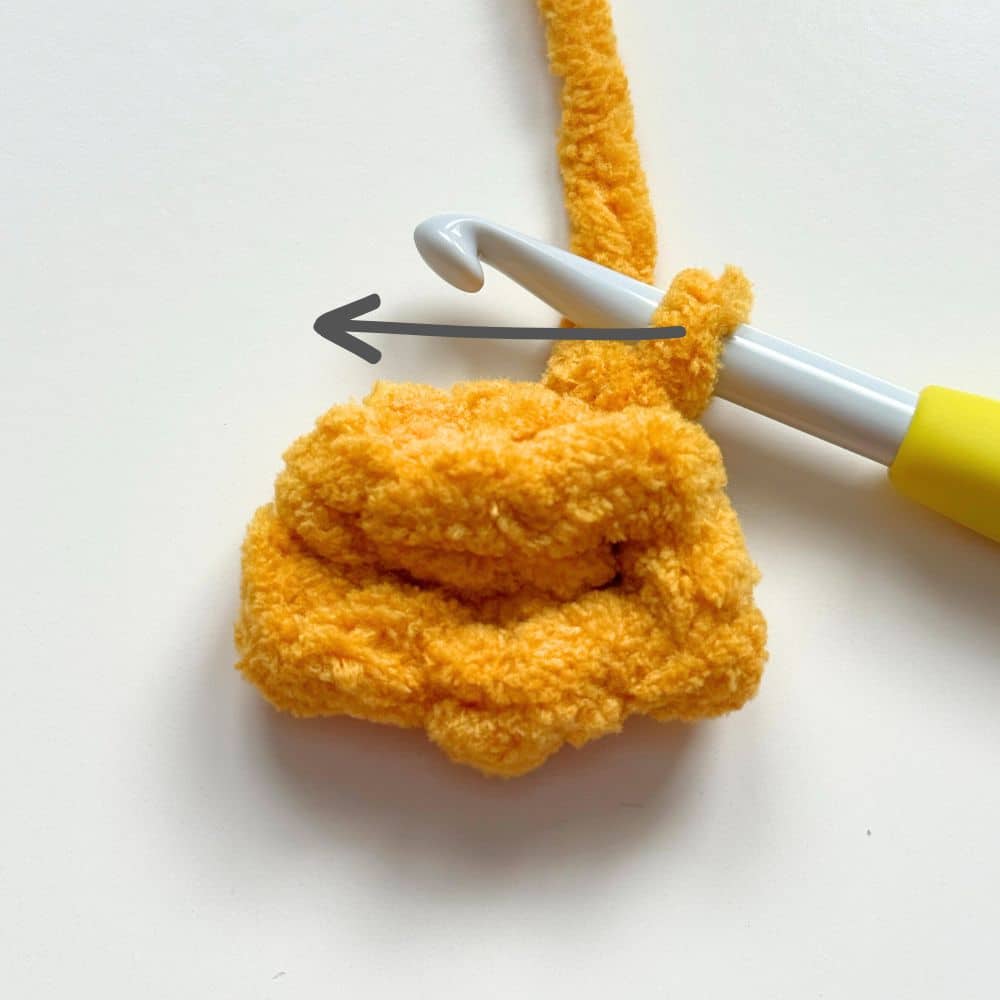
Ch 4, starting in the 2nd back bump from your hook (dc, sl st into the same st) x 3, ch 1
Round 1: rotate your work and begin working in the round by placing 3 sc in the FLO of the initial ch sts. Turn your work and continue with 3 sc into the loops on the other side. There are now a total of 6 sc around.
Squeeze top of foot flat and 3 sc across to close. FO, leaving a short tail and set aside.
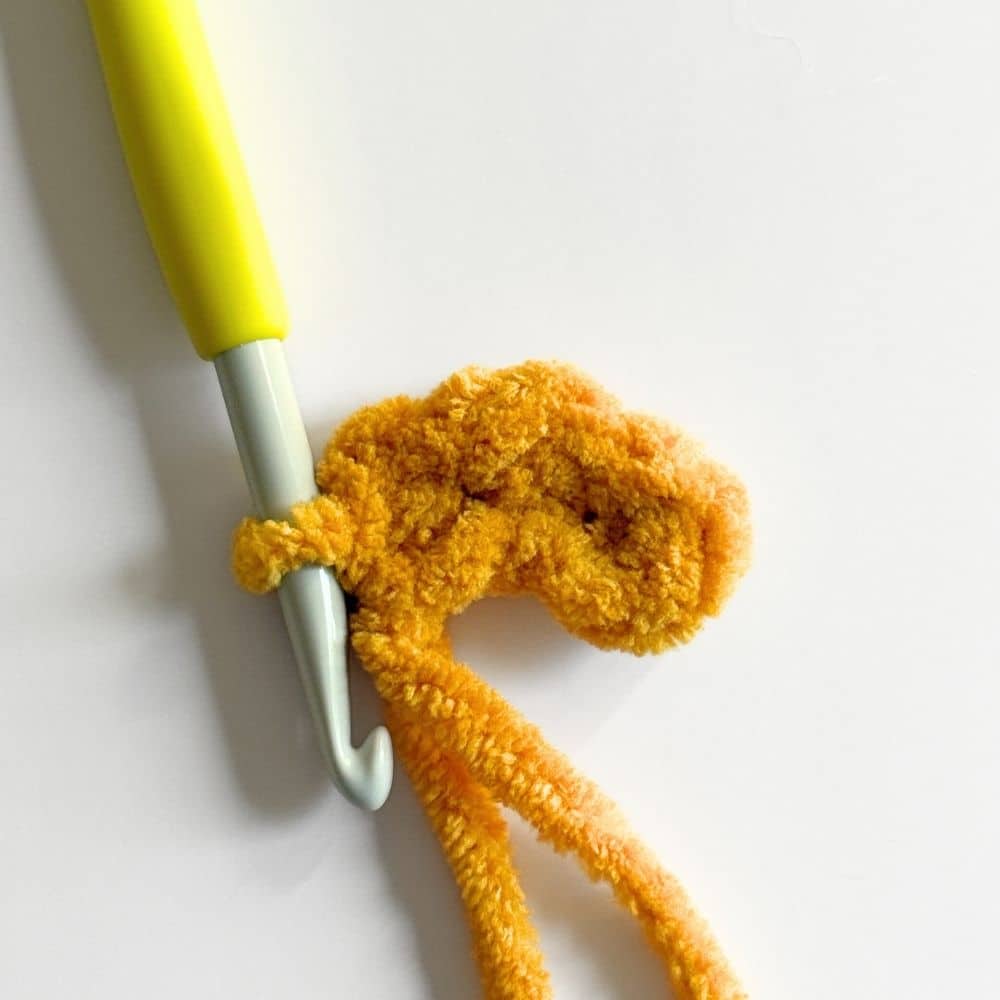
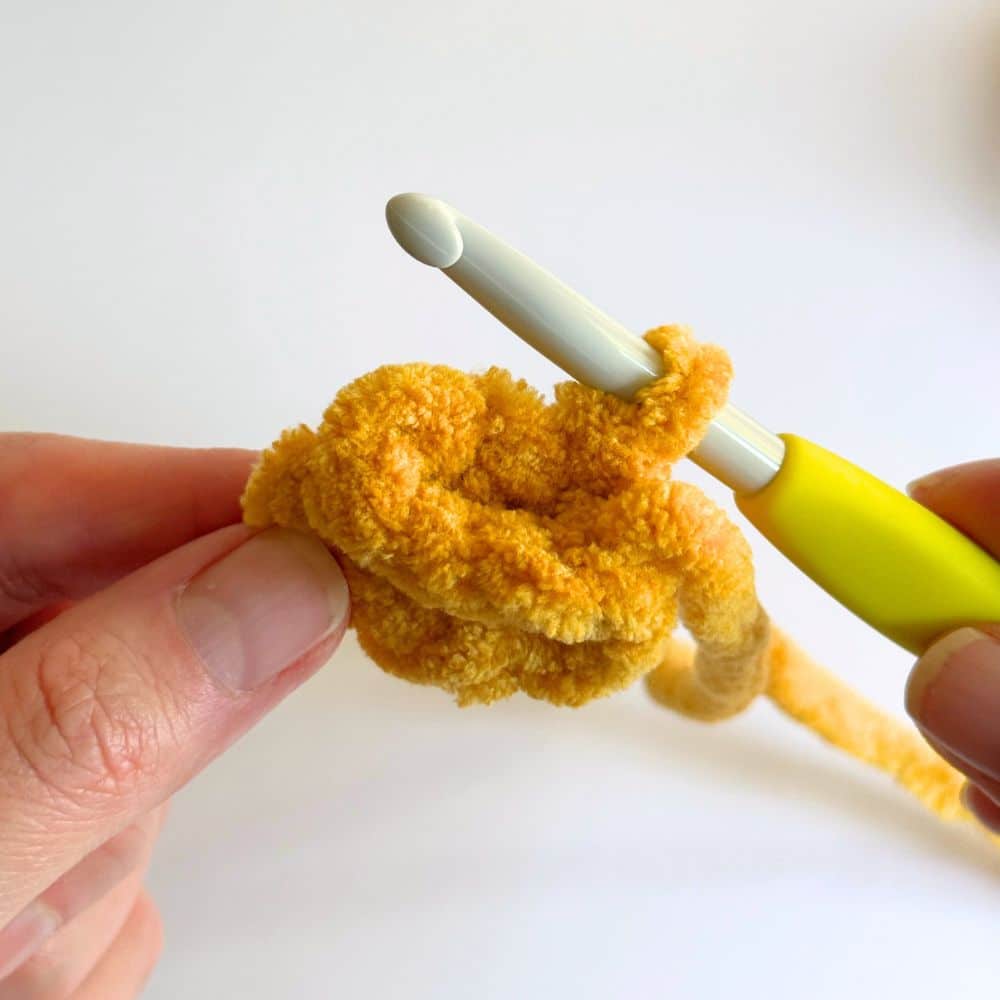
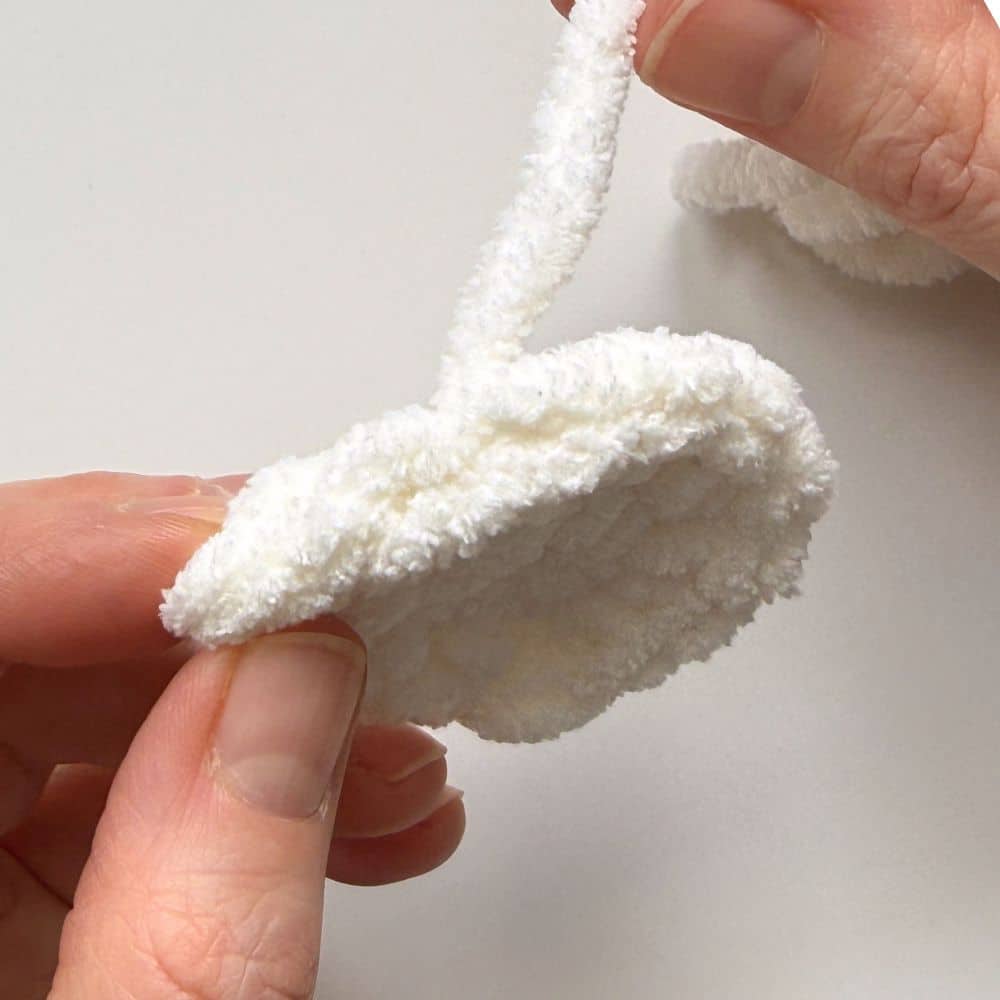
WINGS:
- Make 2
Round 1: 8 sc in mc (8)
Round 2: Into 1st st (hdc, dc, hdc), then 2 sc, inc x 3, 2 sc (13)
FO, leaving a 5″ tail.
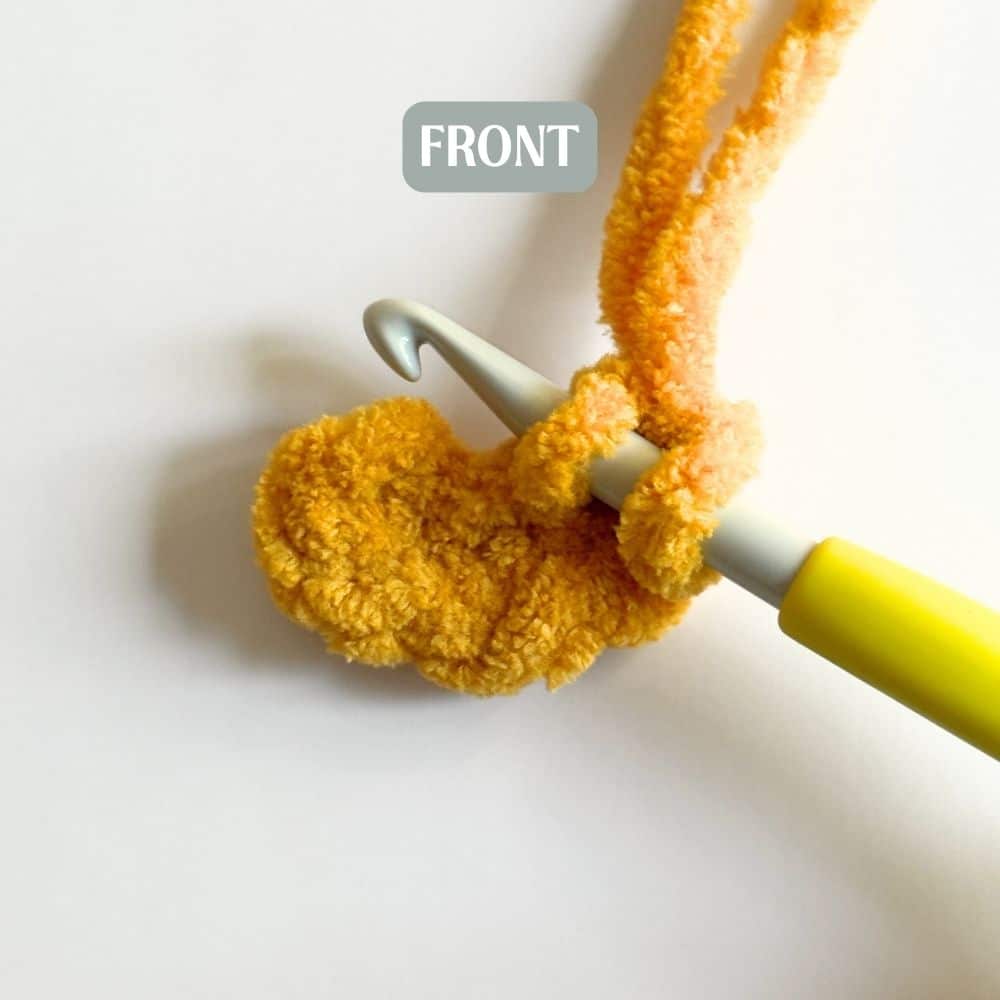
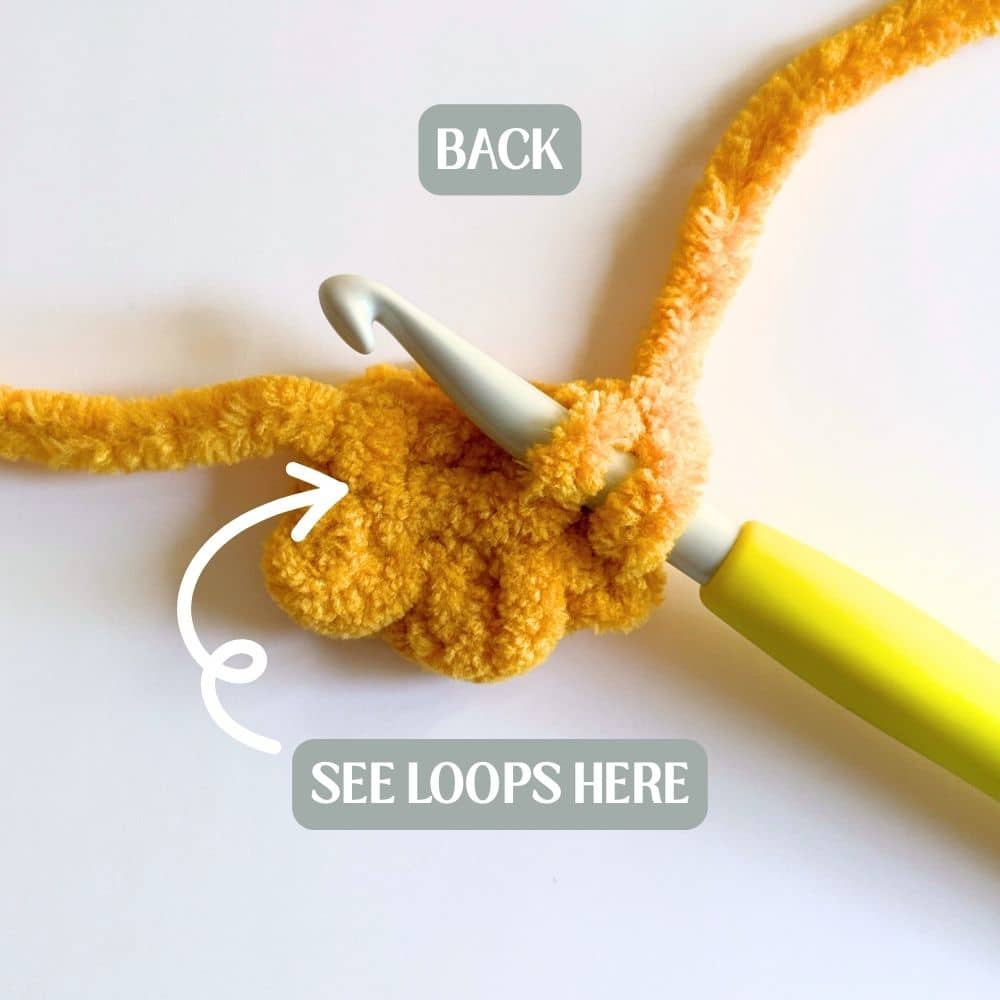
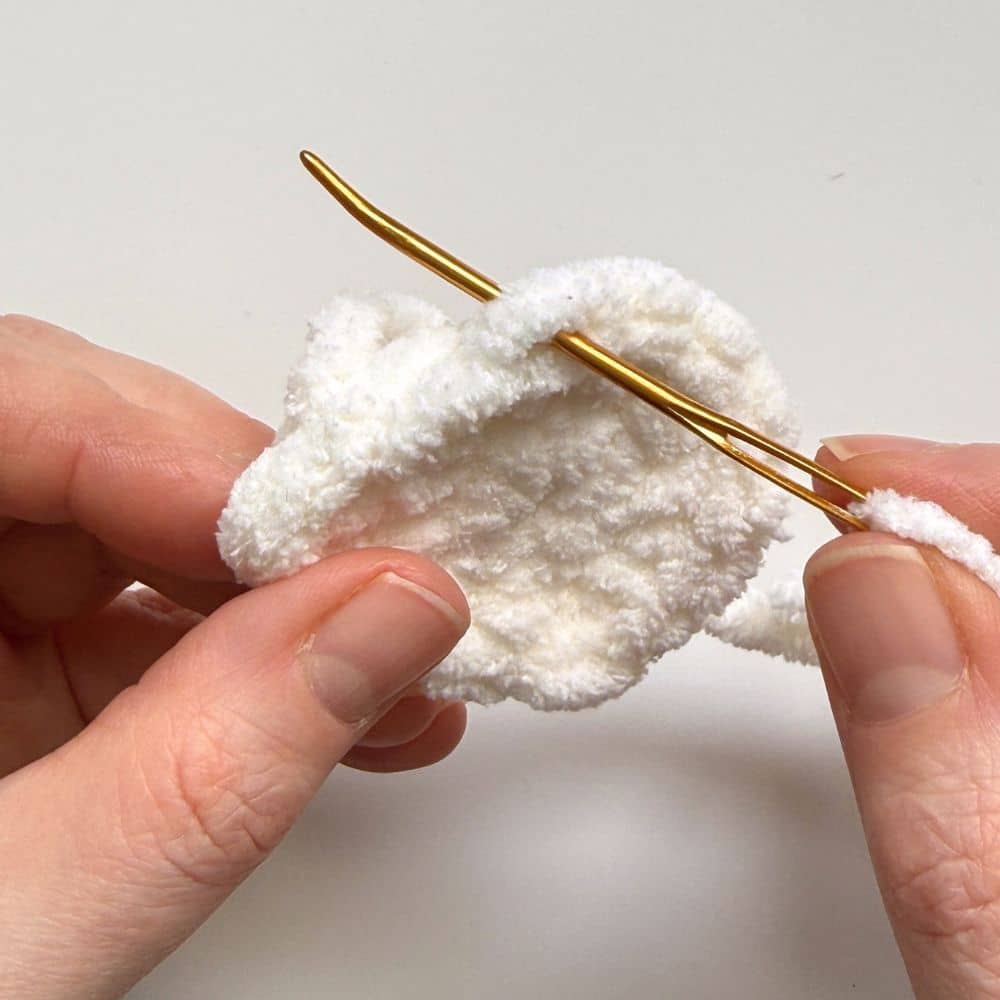
WINGS INVISIBLE FINISH:
This step creates a seamless transition between the last and first sts of the round.
1: With a yarn needle, bring finishing tail through top loops of the second st of round 2, from front to back.
2: Bring tail through back loop only of the last st from the final round, from front to back.
3: Pull gently until tail forms a new set of “top loops”.
Weave in ends.
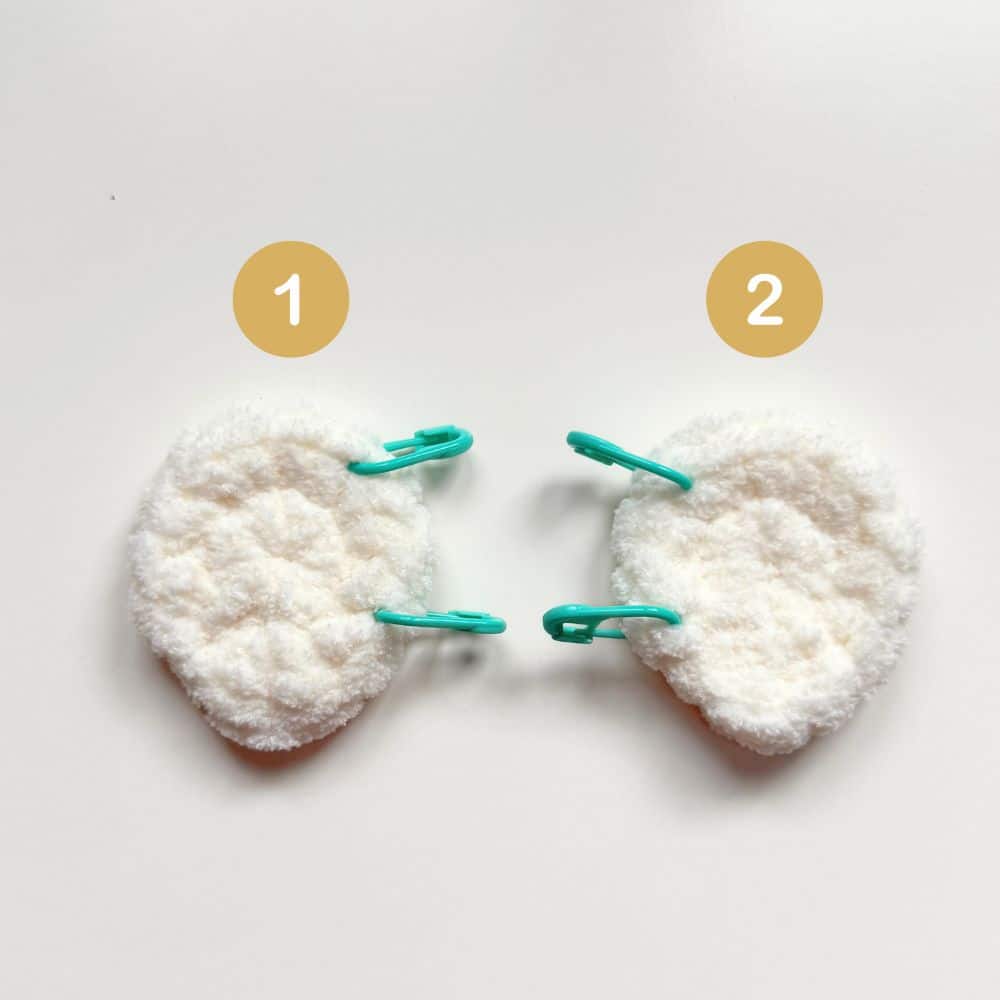
Use stitch markers to mark 4 sts on each wing for attaching to the body later. These are a guide only, adjust if needed to get the correct angle when attaching to the body.
Wing 1: Mark sts 5-8
Wing 2: Mark sts 10-13
Set aside.
BODY:
Follow Mabel Chicken pattern as written with the following modifications:
*Feet will be crocheted into round 5. Finishing tail should be on the left when attaching.
Round 5: BLO 9 sc, 3 sc through 1st foot, BLO 3 sc, 3 sc through 2nd foot, BLO 12 sc (30)
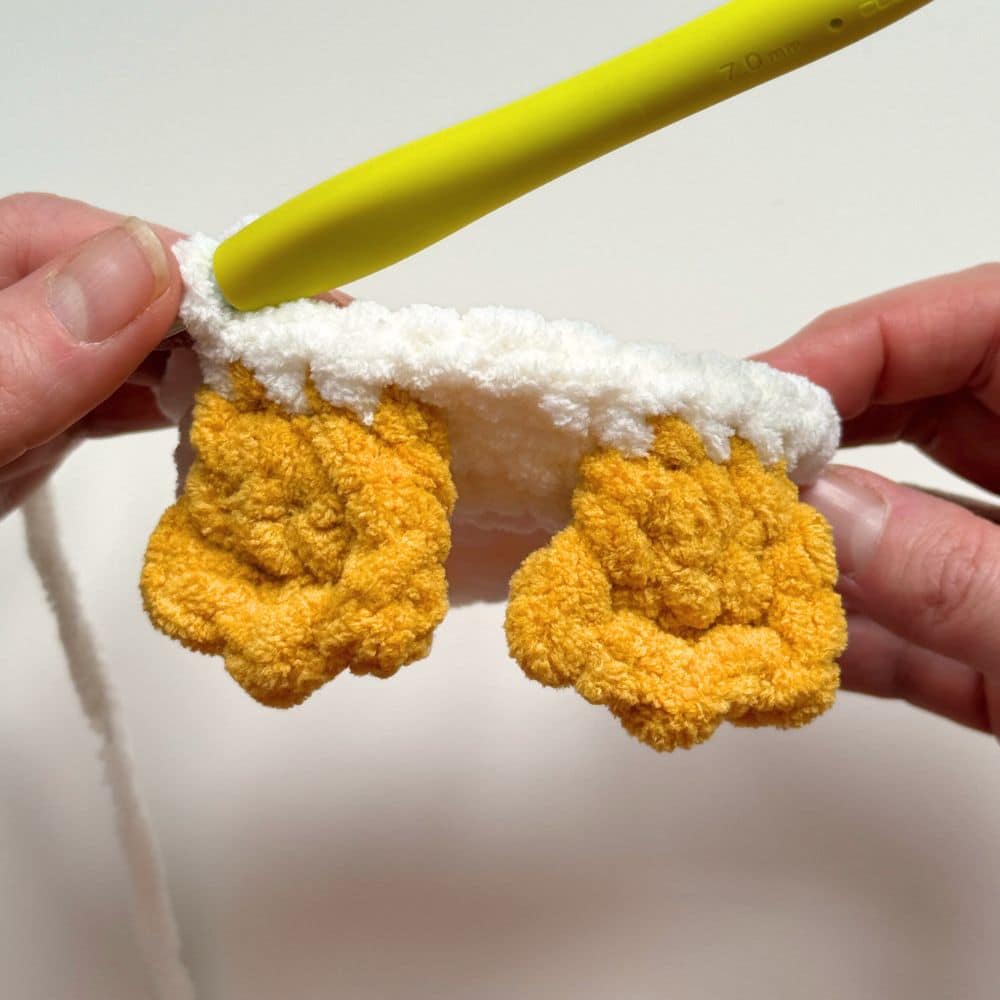
*Crochet wings into round 9 through the 4 marked sts, with right sides facing outward.
Round 9: 5 sc, 4 sc through 1st wing, 11 sc, 4 sc through 2nd wing, 6 sc (30)
FO, leaving a 14″ tail and complete invisible finish as written, do not cut yarn.
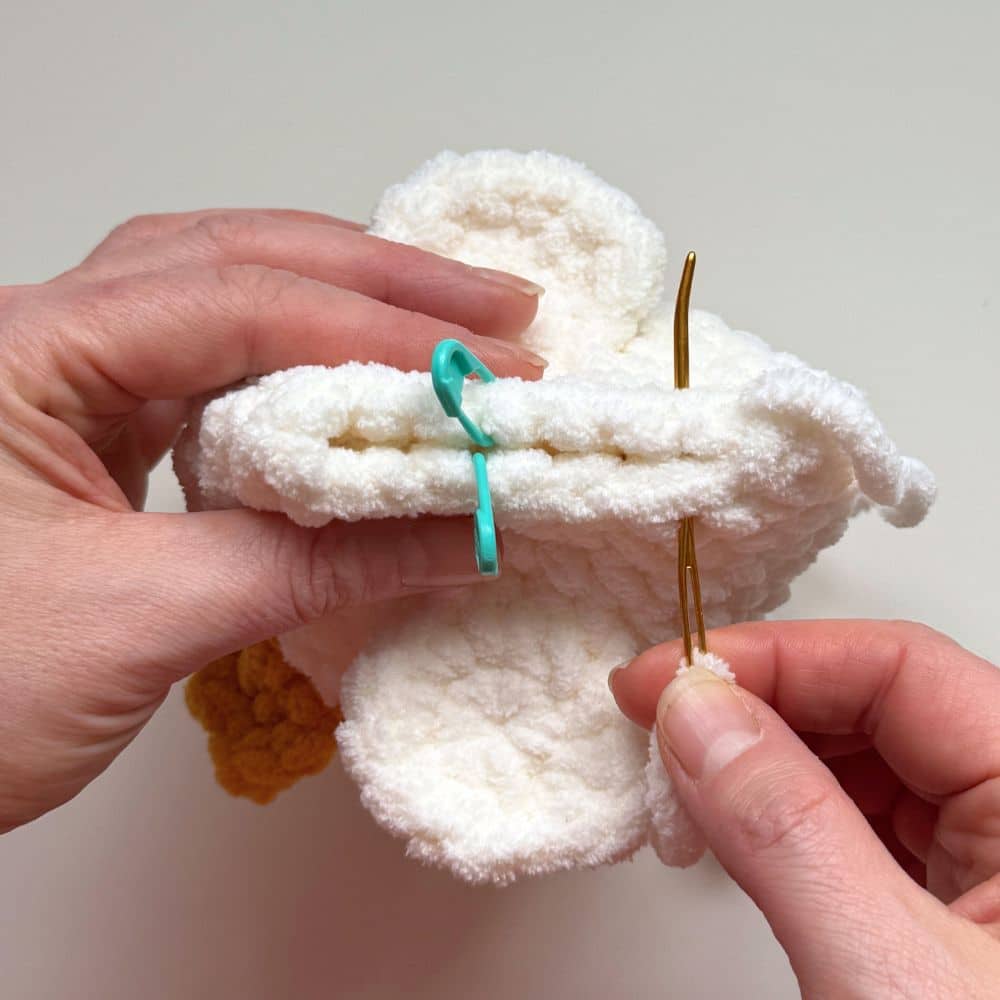
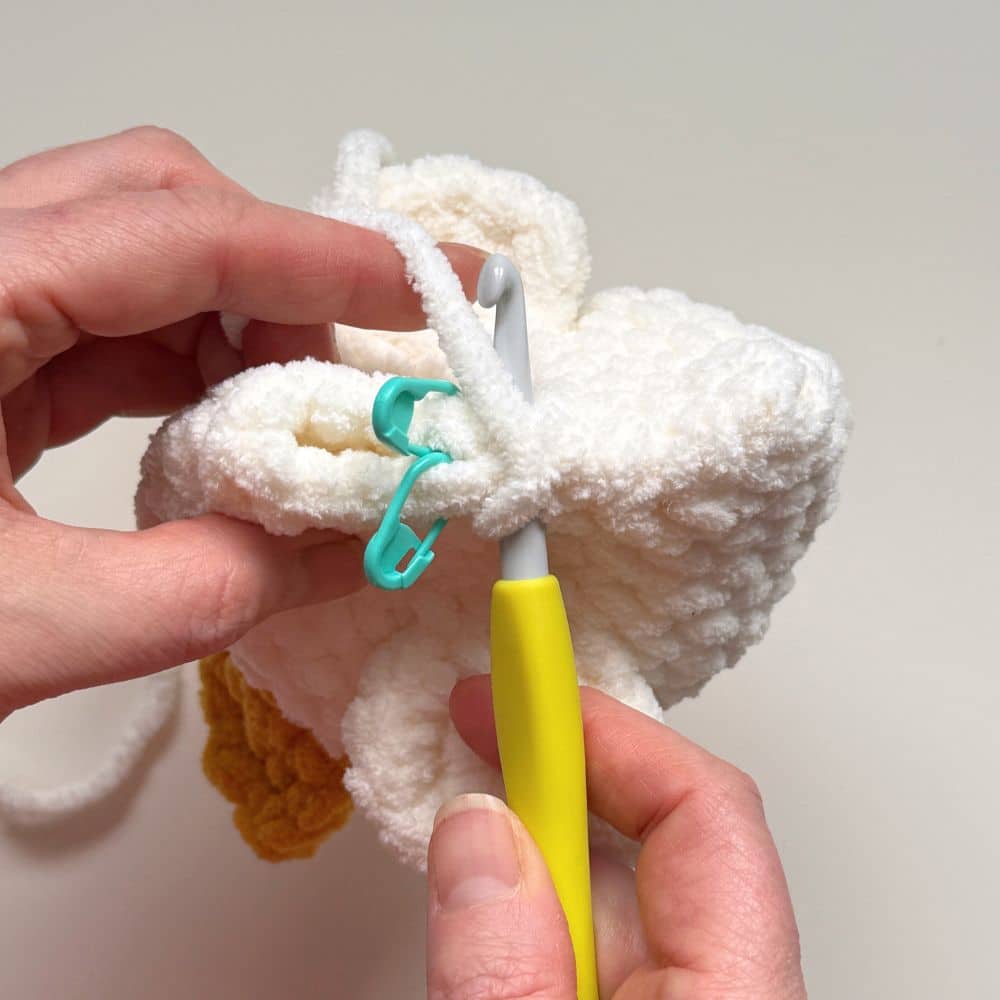
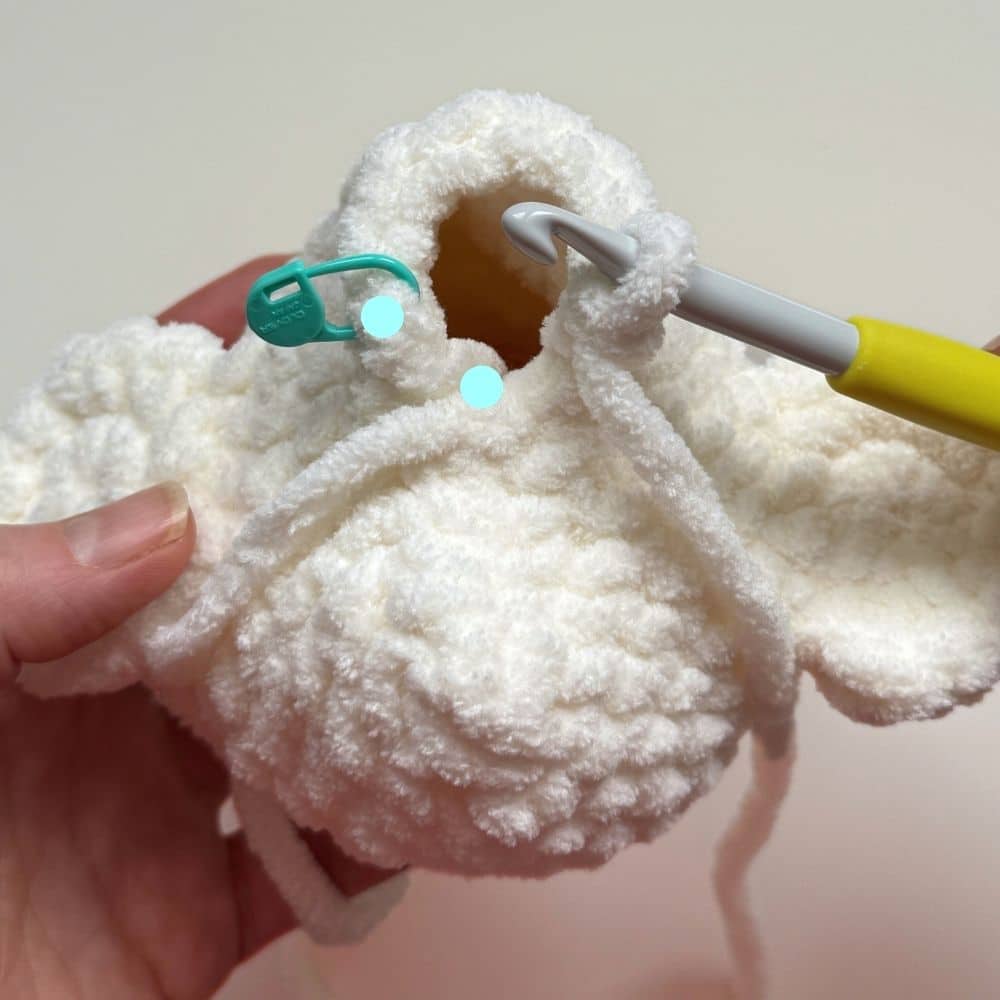
CLOSE THE BACK:
1: Pinch the top of the body with the 14″ yarn tail at the back (this will become the tail).
2: Mark the 8 stitches at the opposite end from the yarn tail centered with the feet and wings.
3: Use the yarn tail to whipstitch from the corner to the stitch markers. Begin to stuff the body before reaching the markers.
4: With your hook, YO and work a sl st into the last whipstitch space, just before the markers. FO, leaving the tail out of the body. Stuff the body.
NECK:
Join a new strand of yarn on 1st st of round 1 using a standing sc. See special stitches section.
Round 1: sc around (8)
*Optional: work a dec into the sl st made while closing the back in step 5 and the 1st st of round 2 to close the space at the back of the head.
Rounds 2-4: sc around (8) (3 rounds/24 sts)
*Finish stuffing the body and neck. Do not FO, continue to head.
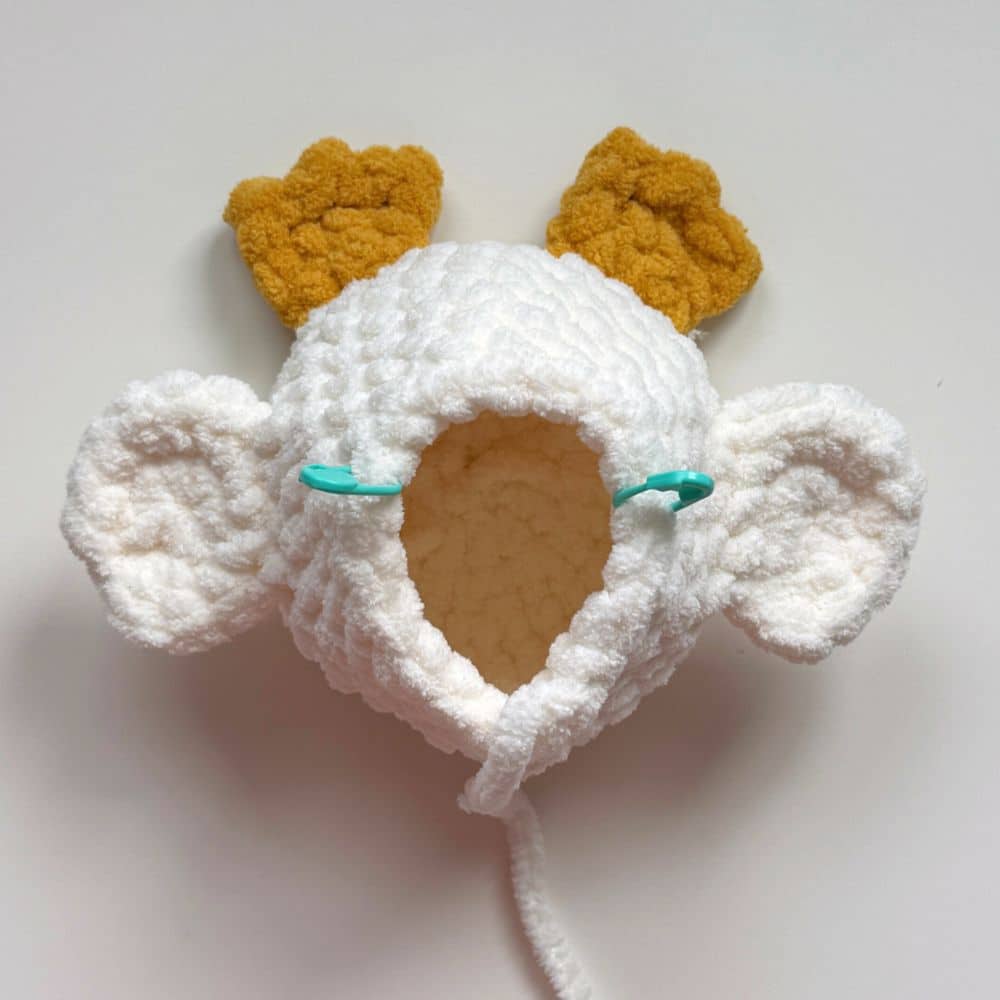
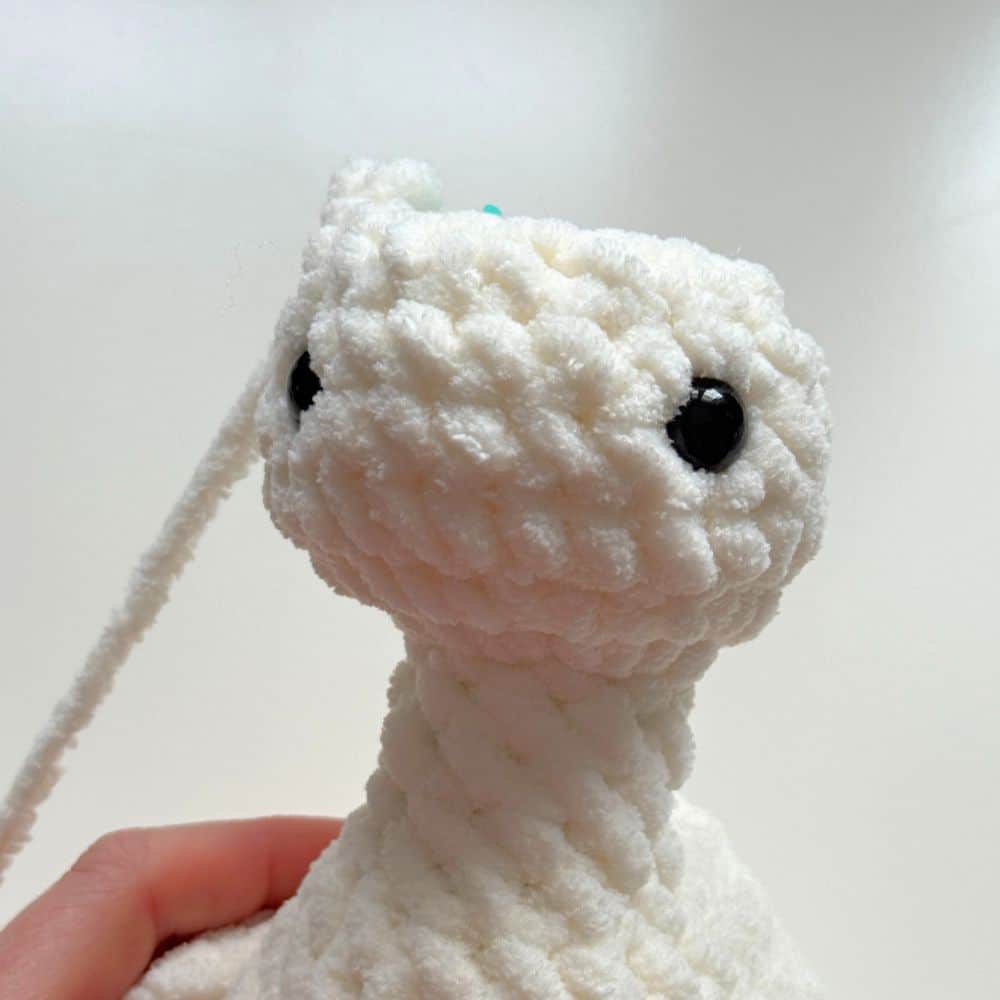
HEAD:
*Inc sts on round 5 should be centered at the front of the head. Adjust sts if needed.
Round 5: 3 sc, inc, 3 sc into each of the next 3 sts, inc (16)
Round 6: 2 sc, (inc, sc) x 7 (23)
Rounds 7-8: sc around (23) (2 rounds/46 sts)
*Dec sts on round 9 should be centered on either side of the head. Adjust sts if needed.
Round 9: 9 sc, dec, 6 sc, dec, 4 sc (21)
Round 10: (1 sc, dec) x 7 (14)
*Place safety eyes (or embroider) between rounds 8-9, 6 sts apart.
*Stuff the head.
Round 11: dec around (7)
Cut yarn leaving a tail for sewing. Pull yarn through last st and sew yarn tail through front loops of each of the 7 sc. Pull tight to close. Use a yarn needle to sew small gap at the back of the neck with a st if needed. FO and weave in ends.
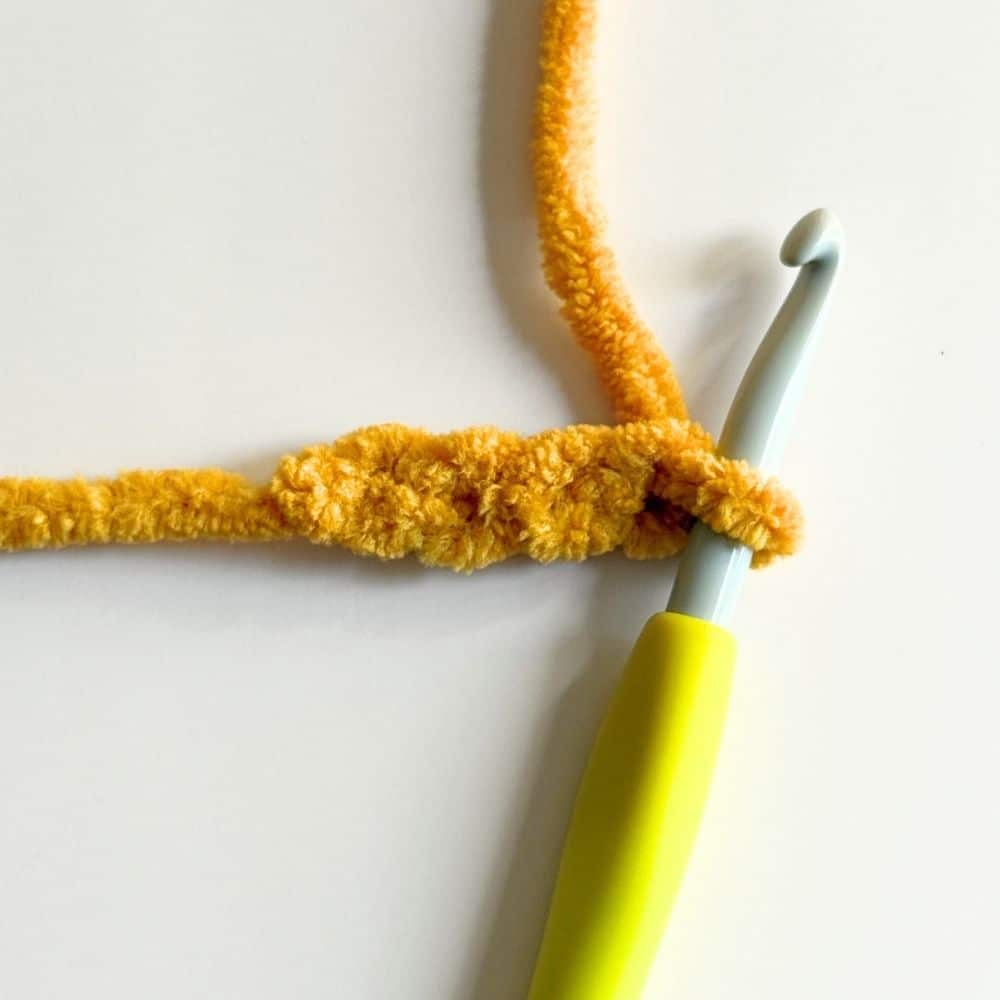
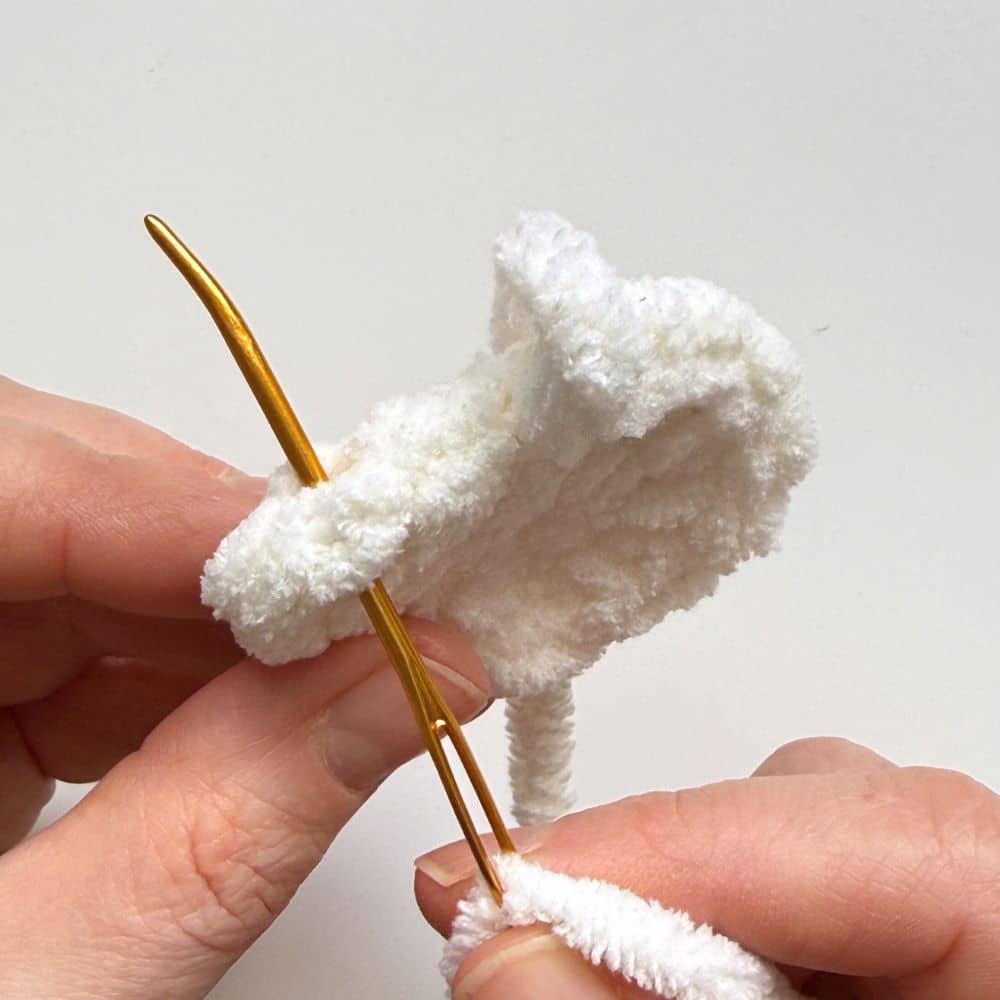
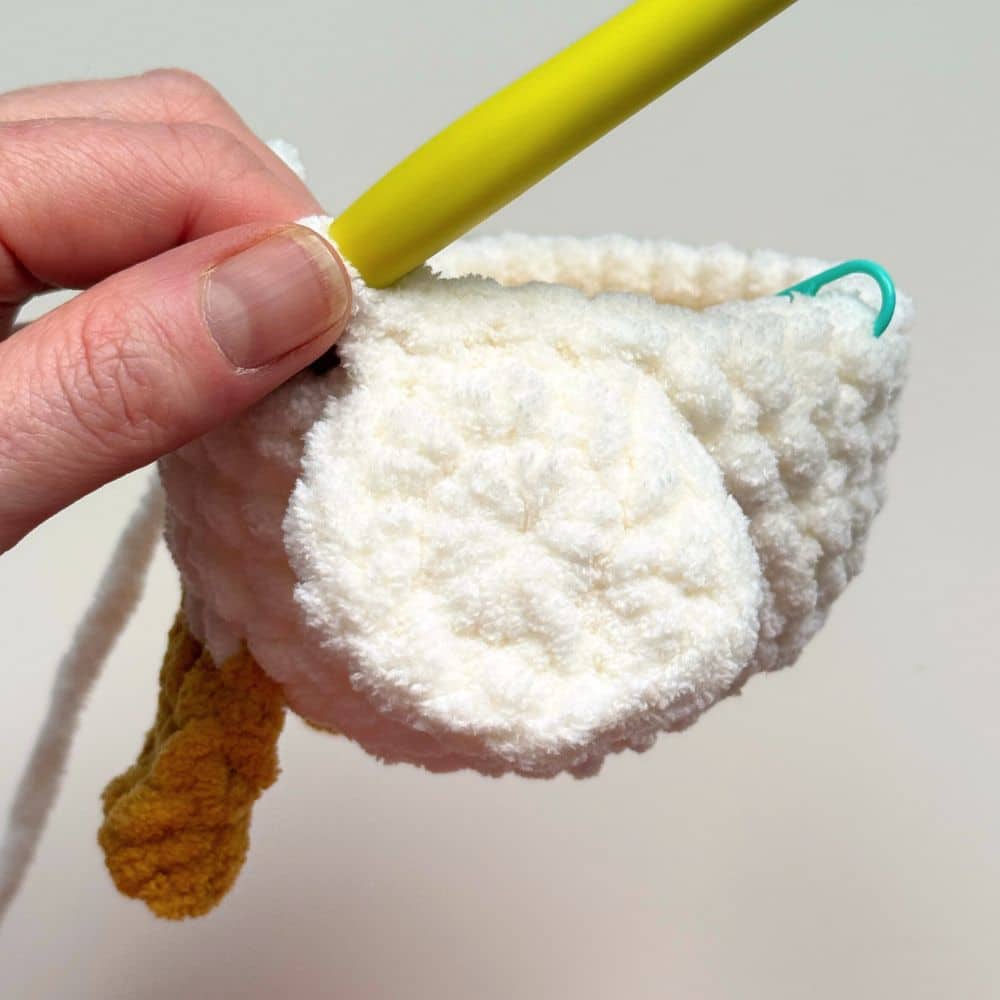
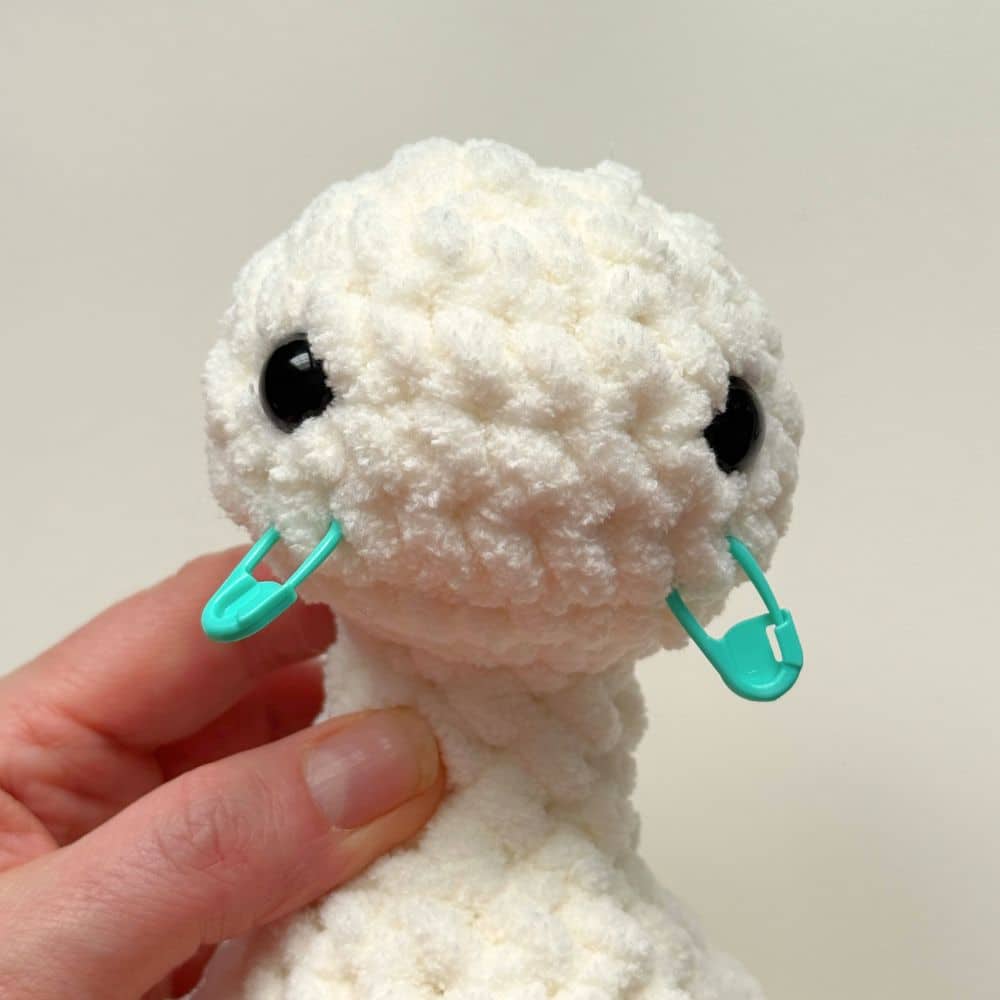
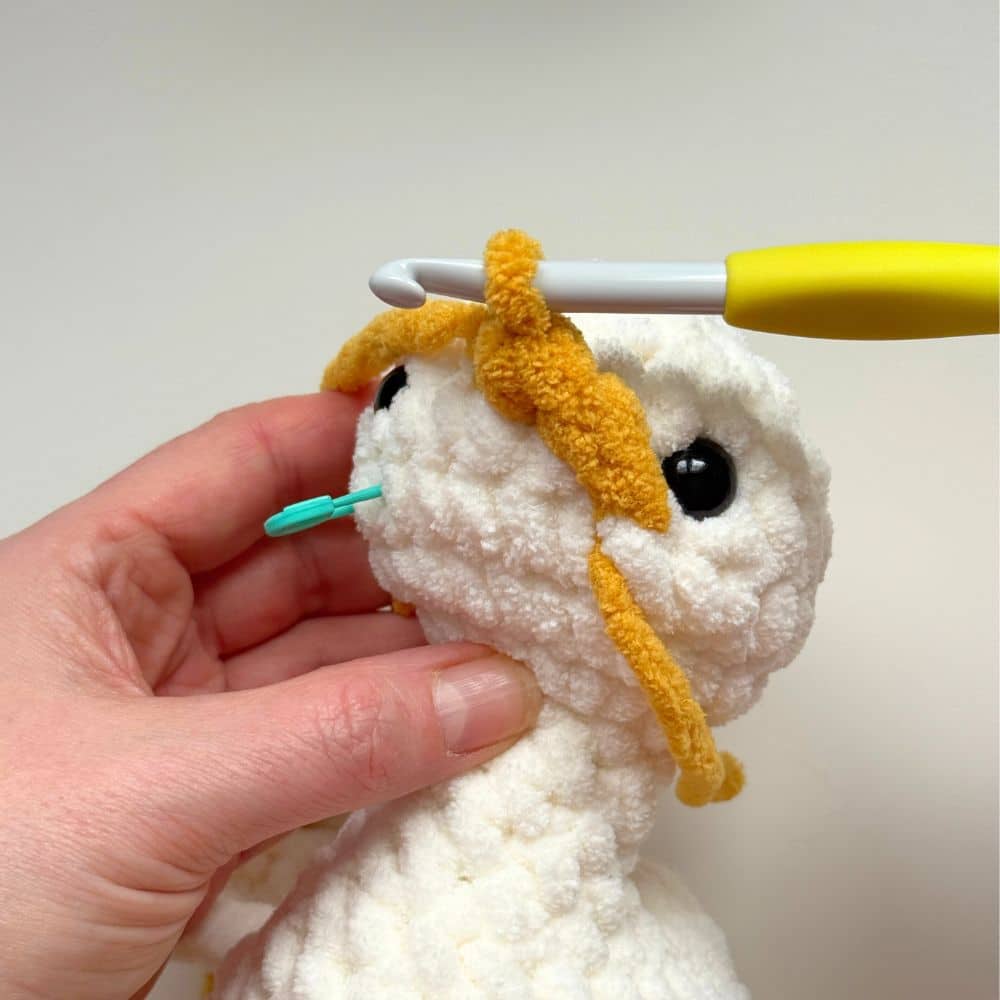
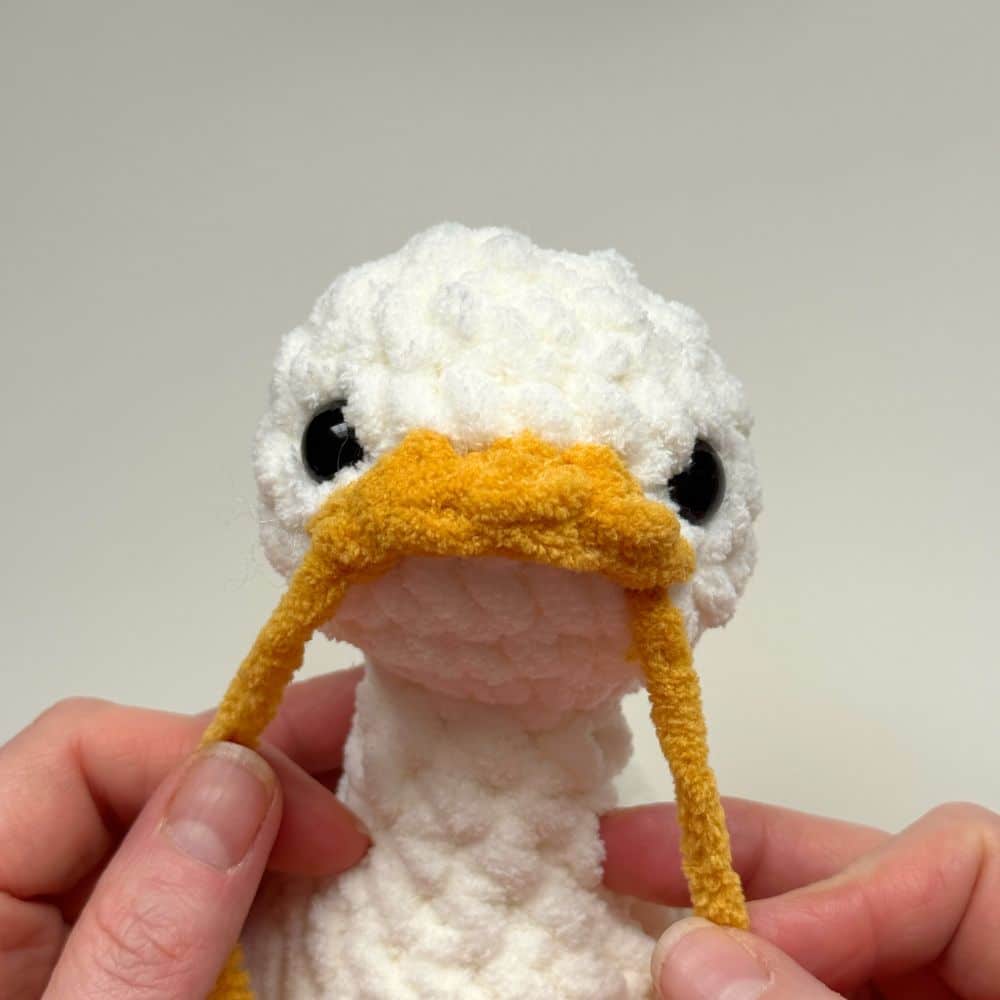
BEAK:
The beak will be crocheted onto the surface of the head.
1: Mark stitches on round 7 under the eyes, with 5 visible stitches between them.
2: Insert hook into the marked st under the right eye. Complete a sl st.
3: Work 3 hdc into the round above, centered between the eyes.
4: Work one final sl st into the marked st under the left eye.
FO and weave in ends.
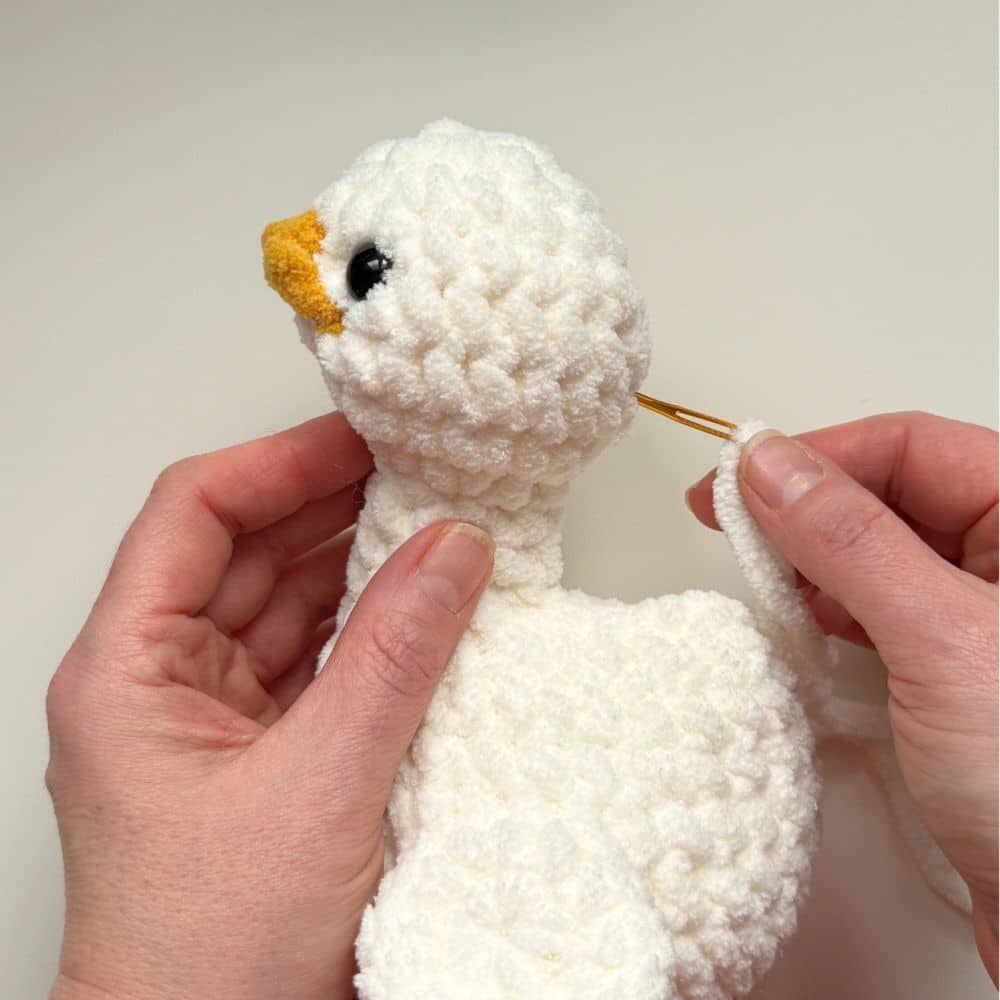
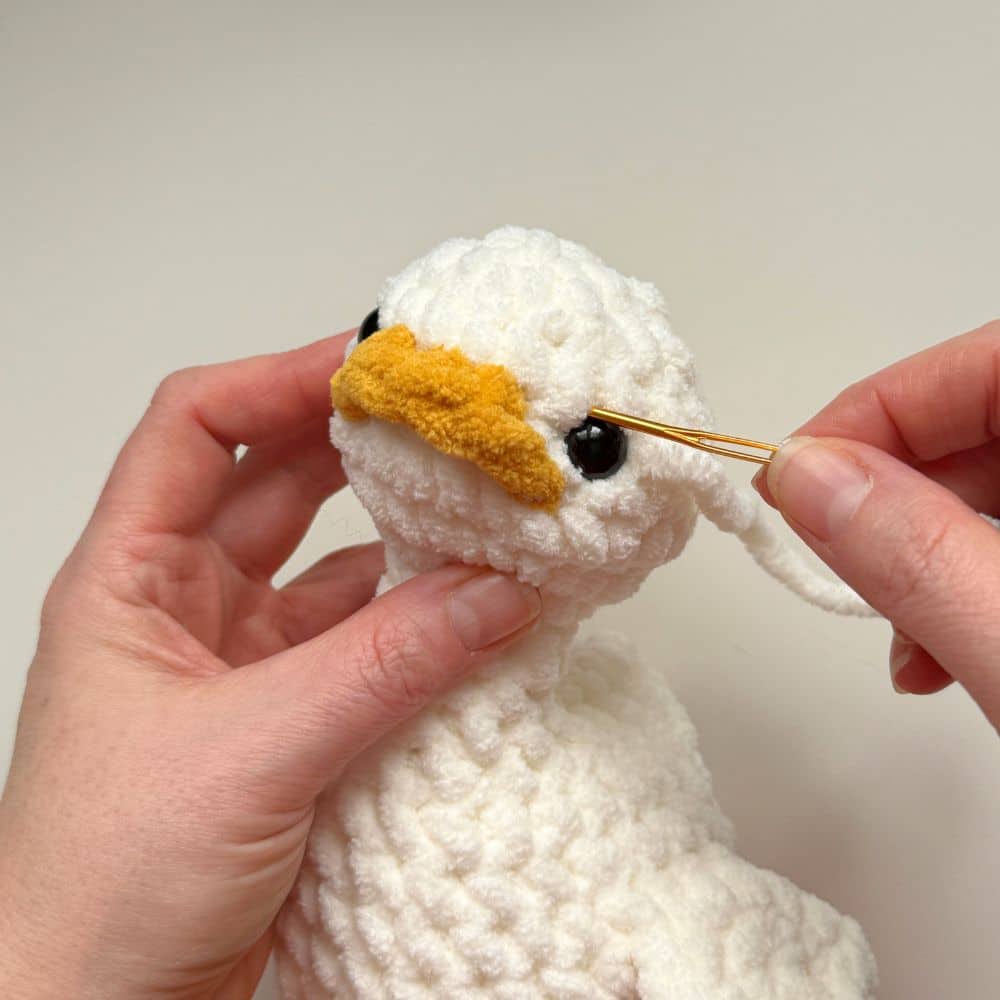
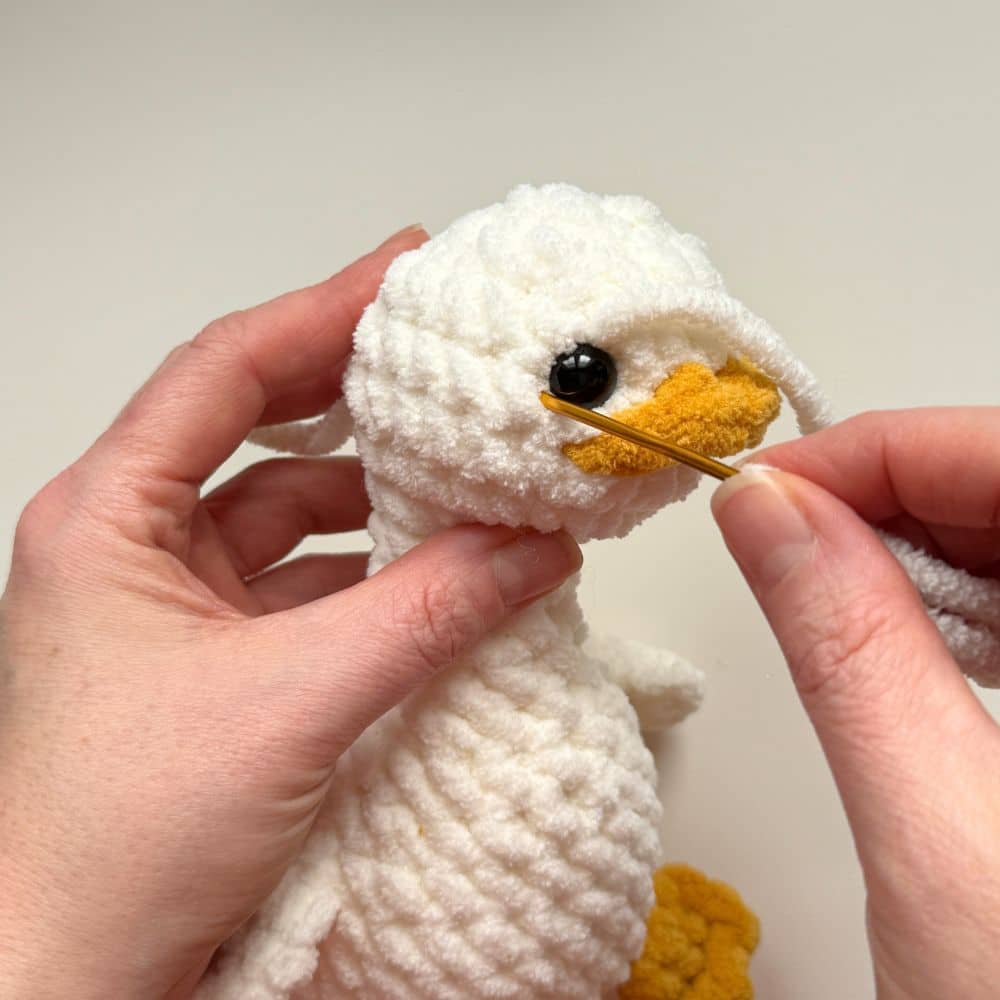
SHAPING THE EYES:
1: Using a 16″ strand of main color yarn, insert needle into the back of the head and come out to the left of Marjorie’s left eye.
2: Insert needle back into the head to the right of the left eye and come out on the top left of the right eye.
3: Insert needle to the right of the right eye and out the same spot at the back of the head.
4: Gently pull on the two strands of yarn until the loops created over each eye are hidden and there is a slight dent created at each eye. Knot and weave in ends.
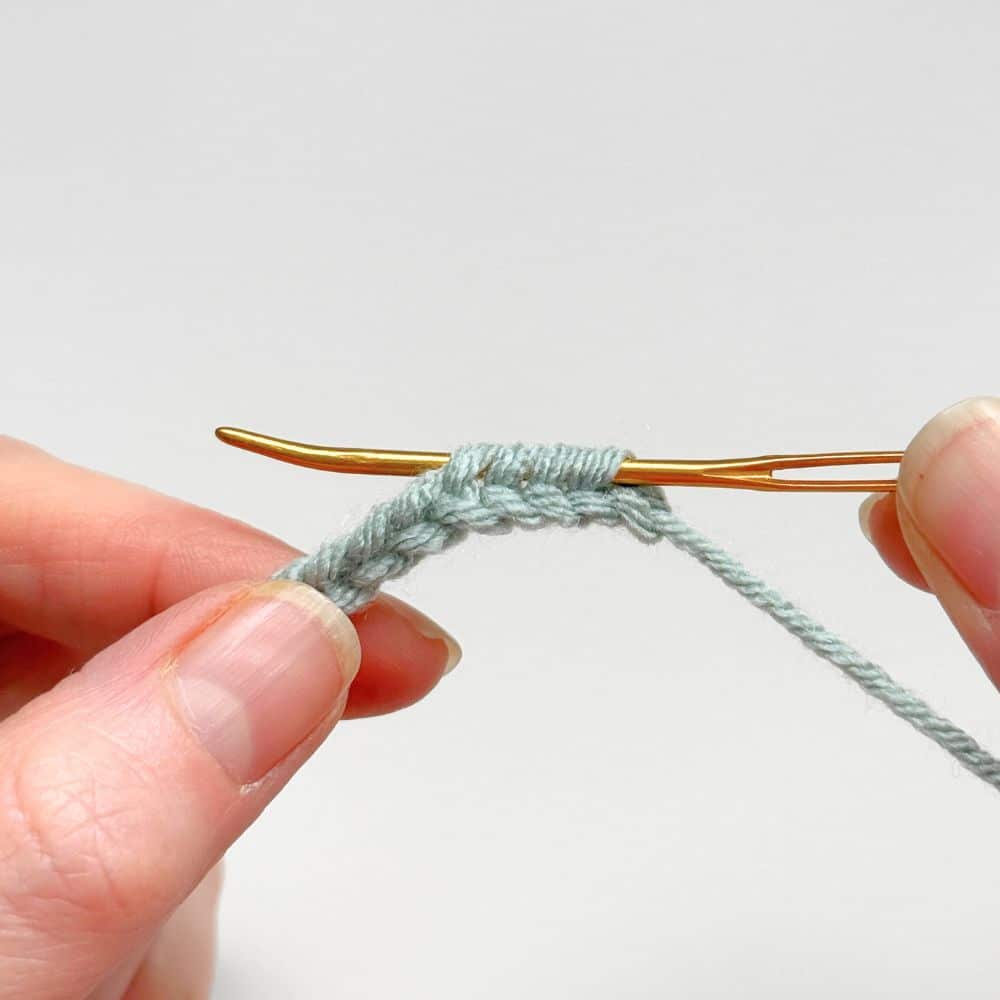
BOW:
Use a 5mm hook and worsted weight yarn.
1: Leaving a 4″ tail, ch 70 *check fit before FO and leave a 4″ finishing tail.
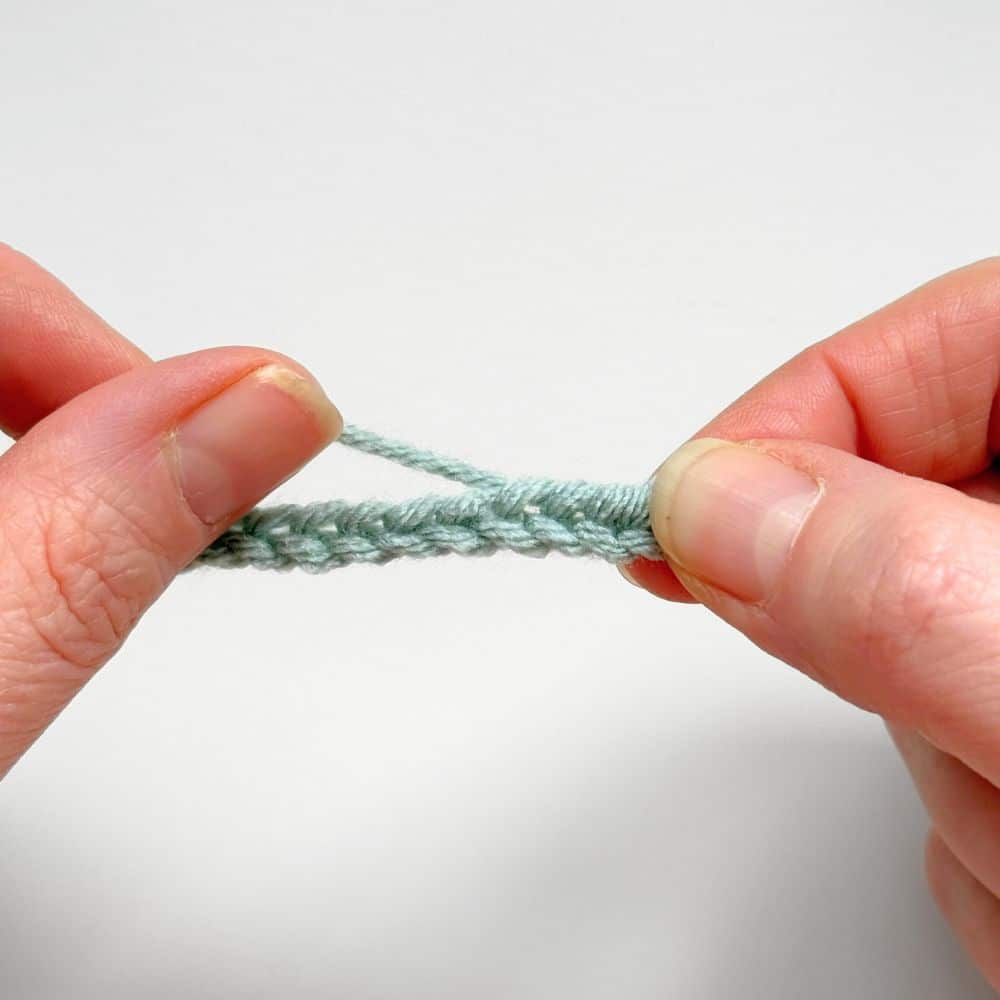
2: Pull yarn tightly to secure at the end of the chain and weave the yarn back through the last four chains.
3: Tie a knot in the chain and trim the tail.
4: Repeat for second tie.
5: Tie the bow around Marjorie’s neck for her finished look!

Your Marjorie Goose is complete!
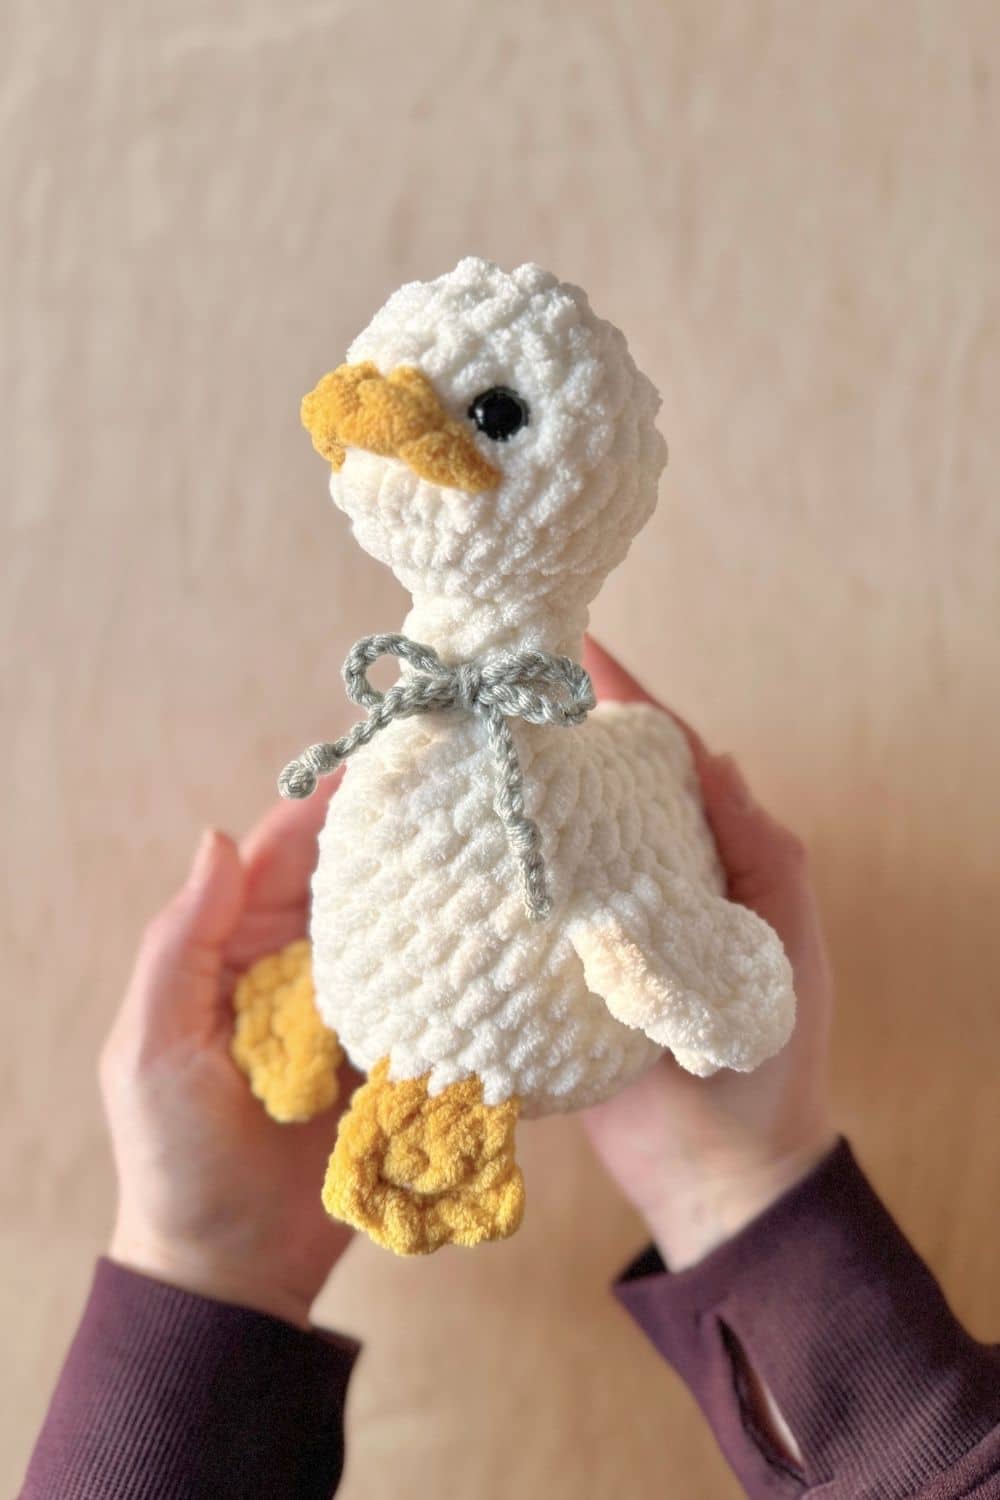
I hope this sweet little goose brings you as much joy as she has for me!
Happy making!
Don’t forget, you can pick up an ad-free copy of the Marjorie Goose Crochet Pattern in my shop or on Etsy. The PDF includes head-to-tail instructions with helpful tips and videos and includes a bonnet as well!

Check out my other popular blog posts here:
Fable Collection Purse Pattern
If you’d like to stay up-to-date with my latest blog posts and free patterns, sign up HERE for my newsletter!
All patterns, designs and photographs included in this blog post are property of Oak and Marlow. This pattern is for personal use only and may not be sold, distributed or transferred to any other person or website. Handmade items produced with this pattern may be sold as long as credit is given to the designer – Oak and Marlow. Copyright 2026.
oh wow!! I’ve never seen a crochet pattern with my name!
I love her!
Thank you! Such a great name! 😉